Load Models
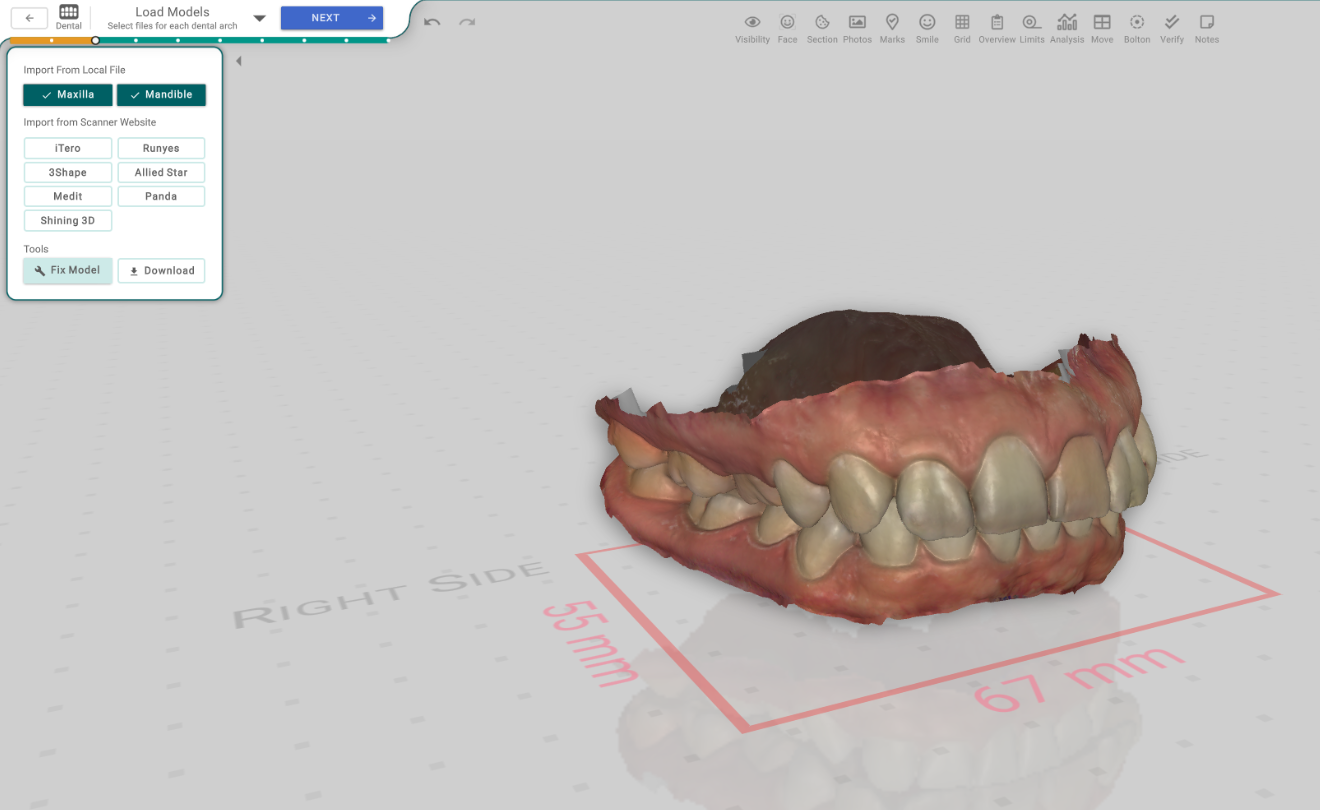
This is where the selected dental scan gets its 3D shape. You bring in the upper and lower arches — from a file on your computer or straight from your scanner's website — and you have two tools to clean and export them. Titan cleans and orients each arch automatically as it loads.
Open it
In the 3D View, the Dental Scan → Load Models step, right after you've selected (or created) the scan.
Import From Local File
Load each arch from a file on your computer:
- Maxilla — opens a file picker for the upper arch.
- Mandible — opens a file picker for the lower arch.
Titan reads .stl, .ply and .obj files. Each button shows a check once its arch is loaded. As it imports, Titan cleans the mesh (keeps the main piece, closes holes, removes a printed base) and orients it to the bite for you.
These buttons are turned off for an export treatment, and a printed or lab-owned case can't change its mesh.
Import from Scanner Website
If your scan lives in your scanner's cloud, import it without a file. Each button opens that scanner's import window, where you sign in and pick the case:
- iTero
- Runyes
- 3Shape
- Allied Star
- Shining 3D
- Medit
- Panda
Tools
- Fix Model — opens the scan-repair step so you can clean up the mesh (close holes, smooth rough spots) before moving on.
- Download — saves the loaded arches as STL files to your printing folder. It turns on once at least one arch is loaded.