Teeth Root
This is the last step before the treatment itself. Here you give each tooth a root, set the spaces between teeth, and sculpt the geometry if a tooth needs tidying. The panel has three tabs — Roots, Spaces and Sculpt — and everything here is edited on the scan's starting position, not on a staged aligner.
Open it
In the 3D View, the Teeth Root step — its header reads "Tweak the root parameters", right after Identify Teeth. Switch between the three tabs at the top of the panel.
Roots
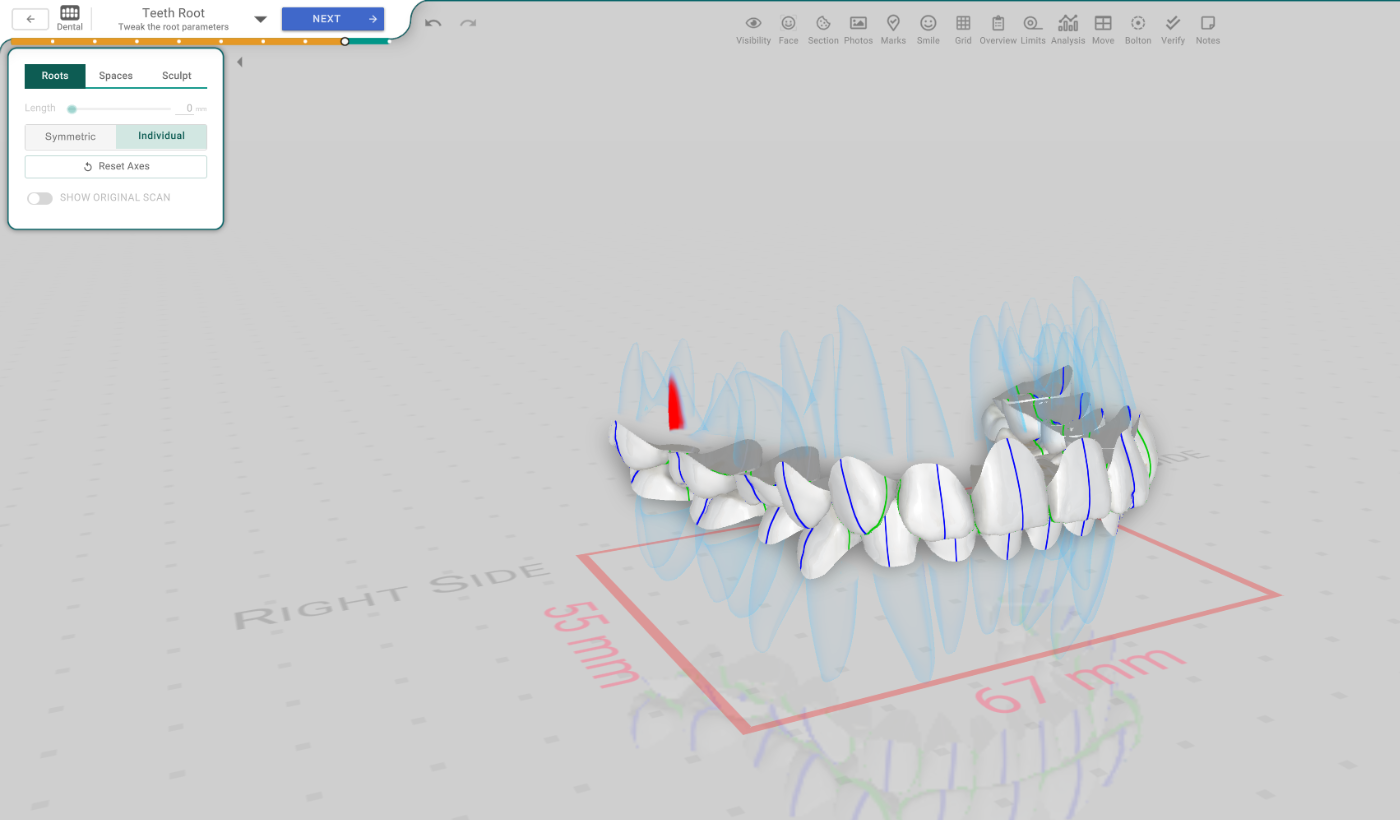
Give each tooth its root axis and length:
- Length — select a tooth, then set how long its root is. The slider is greyed out until you pick a tooth.
- Symmetric / Individual — edit the roots mirrored across the arch, or one tooth at a time.
- Reset Axes — put the root axes back to the computed default.
With a CBCT linked to the scan, the Roots tab also shows Root Type (use the real CBCT root or a virtual one), a Collisions mode (whether collisions count the crown only or the full tooth), and controls to segment the CBCT and show its Bones, Canal and Volume.
Spaces
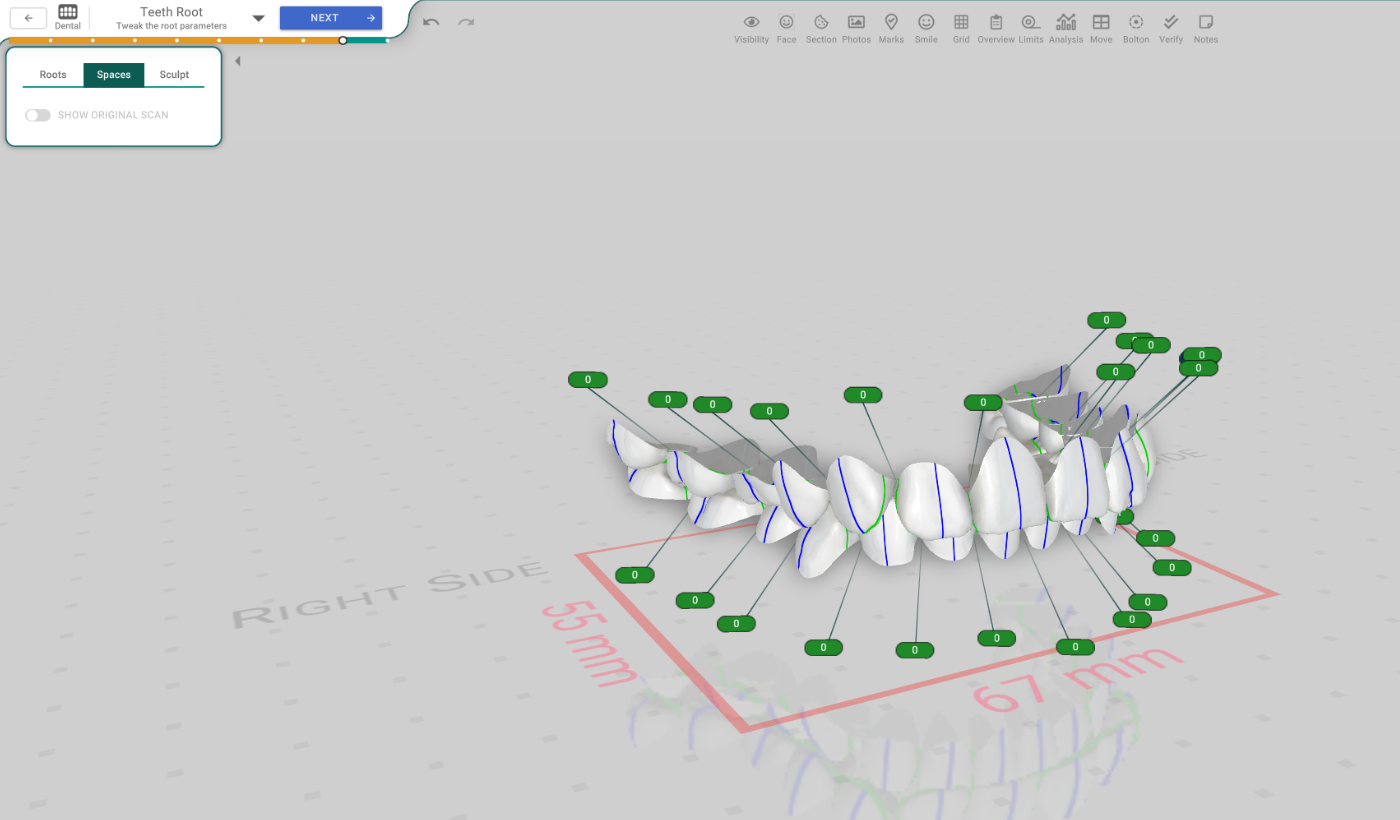
Set the interproximal spaces between the teeth. The value between each pair of teeth is shown on the model, and you adjust it there.
- Apply Recorded Spaces — use the spaces recorded in the planning. It appears only when the planning has them.
- Edit Recorded Spaces — open the spacing chart to correct a recorded value. If a recorded space is too far from the scan to apply, Titan lists it so you can fix it.
Sculpt
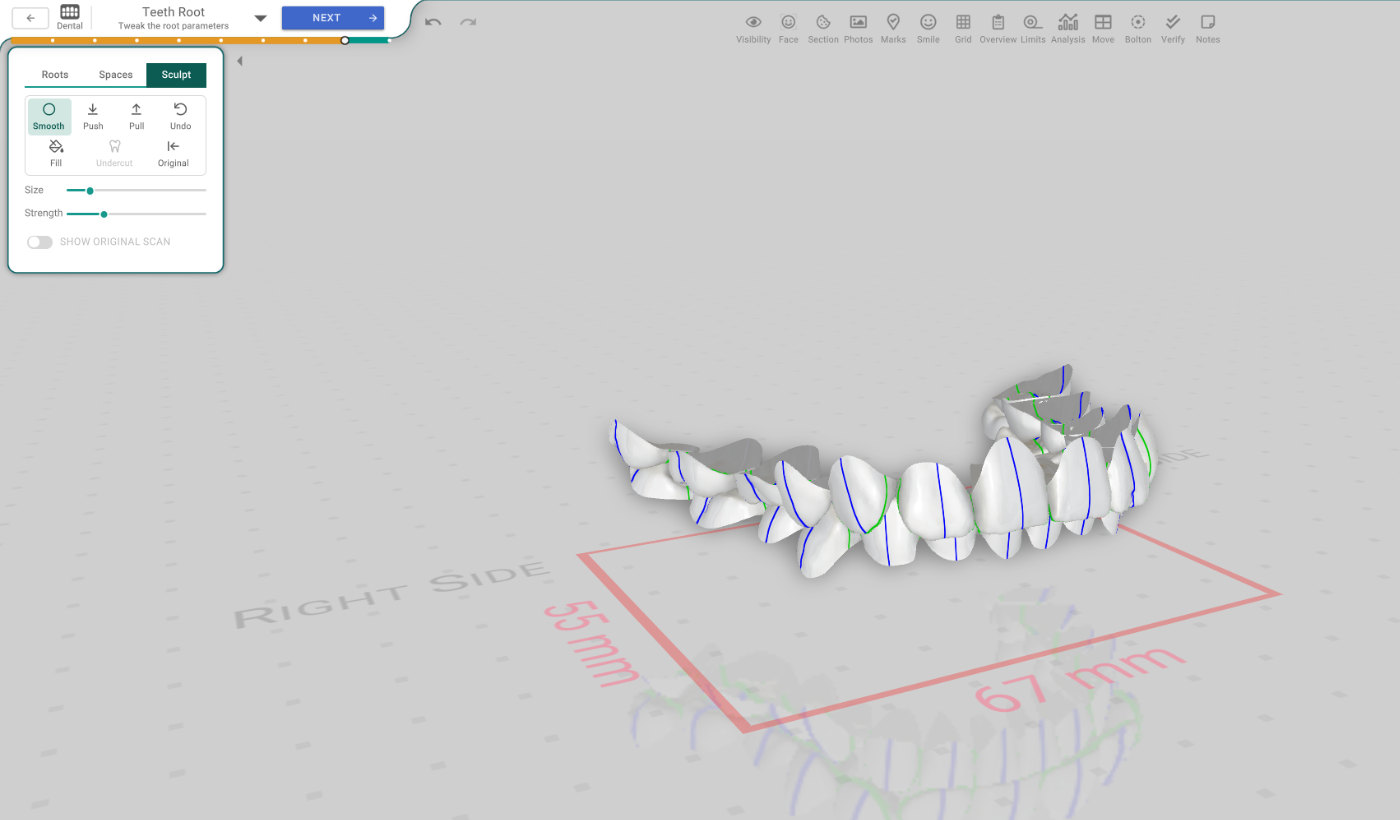
Tidy a tooth's surface with the sculpting brushes:
- Smooth — even out a rough surface.
- Push / Pull — move the surface in or out.
- Fill — close a gap or hole.
- Undercut — remove an undercut.
- Undo — step back a change.
- Original — restore the untouched scan surface.
Set the brush's Size and Strength below the tools.
Good to know
- Show Original Scan (at the bottom of every tab) overlays the untouched scan so you can compare your changes.
- Your geometry changes are kept only when you choose Apply as you leave the step.