Patient Dashboard
The Patient Dashboard is a patient's own page: the hub where you upload their photos, scans and X-rays, keep their medical information, and start a treatment plan. You reach it from the Patients list, or right after adding a new patient.
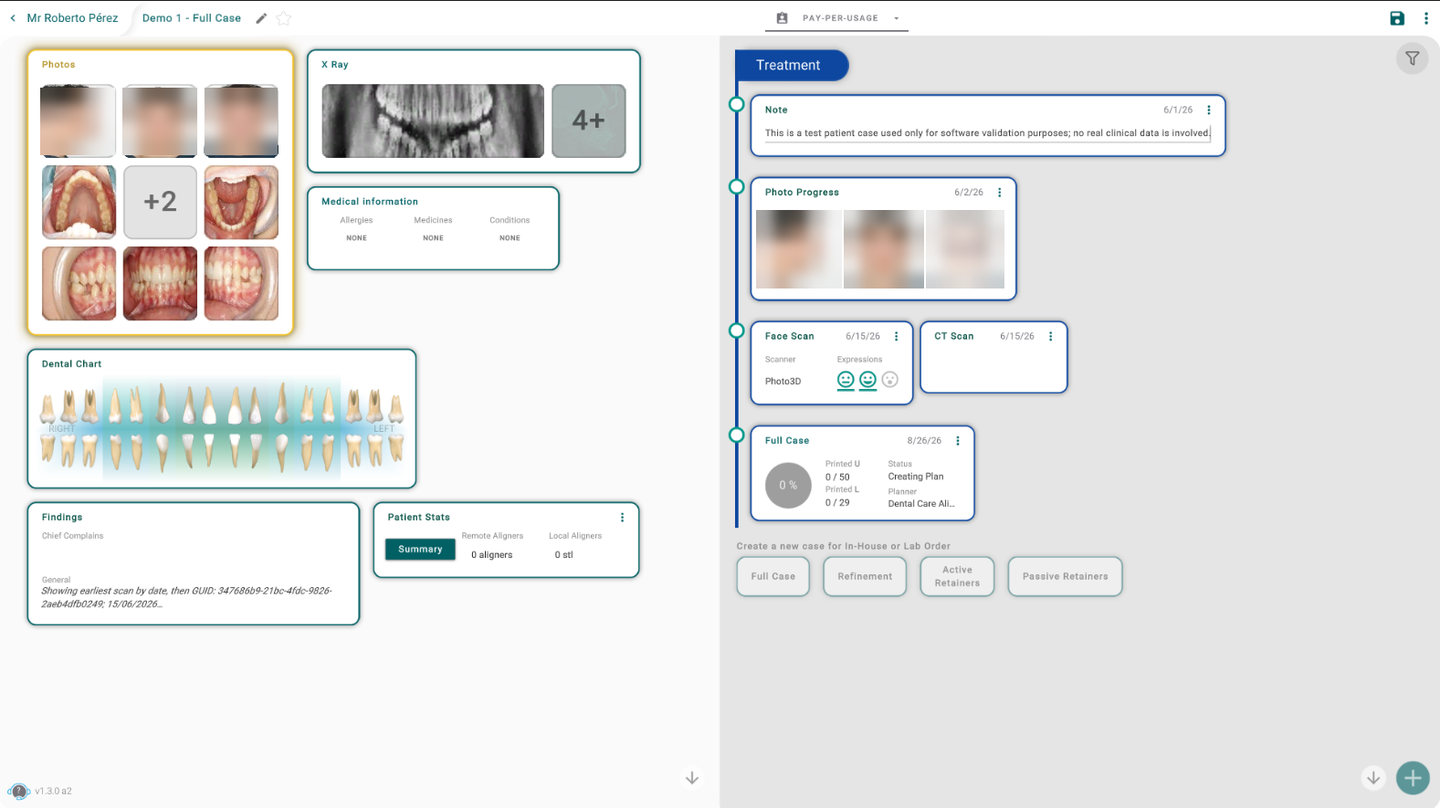
What you'll find here
- Photos — the patient's facial and dental photos; opens the Photo Gallery.
- X Ray — panoramic and cephalometric X-rays.
- Medical Information — allergies, medications, conditions, history and referrals; click the + to open the Medical Information popup.
- Dental Chart — mark a tooth as missing, a veneer, an implant or a bridge; opens the Dental Chart.
- Findings — diagnostic findings for this patient.
- Patient Stats — a summary of spending and aligners used.
On a brand-new patient these cards start empty, and fill in as you add the patient's data, as in the screenshot above.
Adding data with the "+" button
The green + button in the bottom-right corner opens a menu with everything you can import or create for this patient:
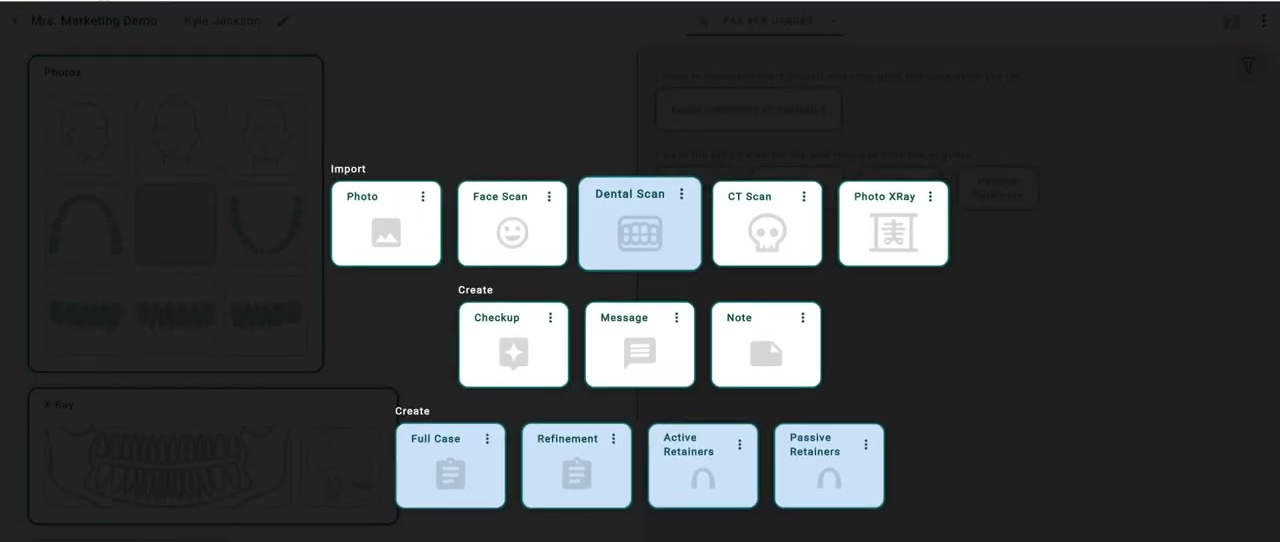
- Import → Dental Scan, Face Scan, or CT Scan open the 3D viewer ready to bring in that kind of scan — these are the models a treatment plan is built on.
- Create → Checkup and Note add a quick record to the patient's history.
- Create → Full Case, Refinement, Active Retainers, Passive Retainers start a treatment plan of that kind.
A couple of items in this menu don't work yet: Photo and Photo Xray currently do nothing when clicked, and Message mistakenly opens the Refinement planning flow instead of creating a message. If you run into either, it isn't something you're doing wrong.
Tips
- Dental, Face, and CT Scan imports are the ones that matter to get a treatment started — the 3D models they bring in are what a plan is built from.
- This page documents the dashboard's overall layout. The cards themselves (Photos, X-Ray, Medical Information, Dental Chart, Findings) will each get their own, closer guide later.