Segmentation
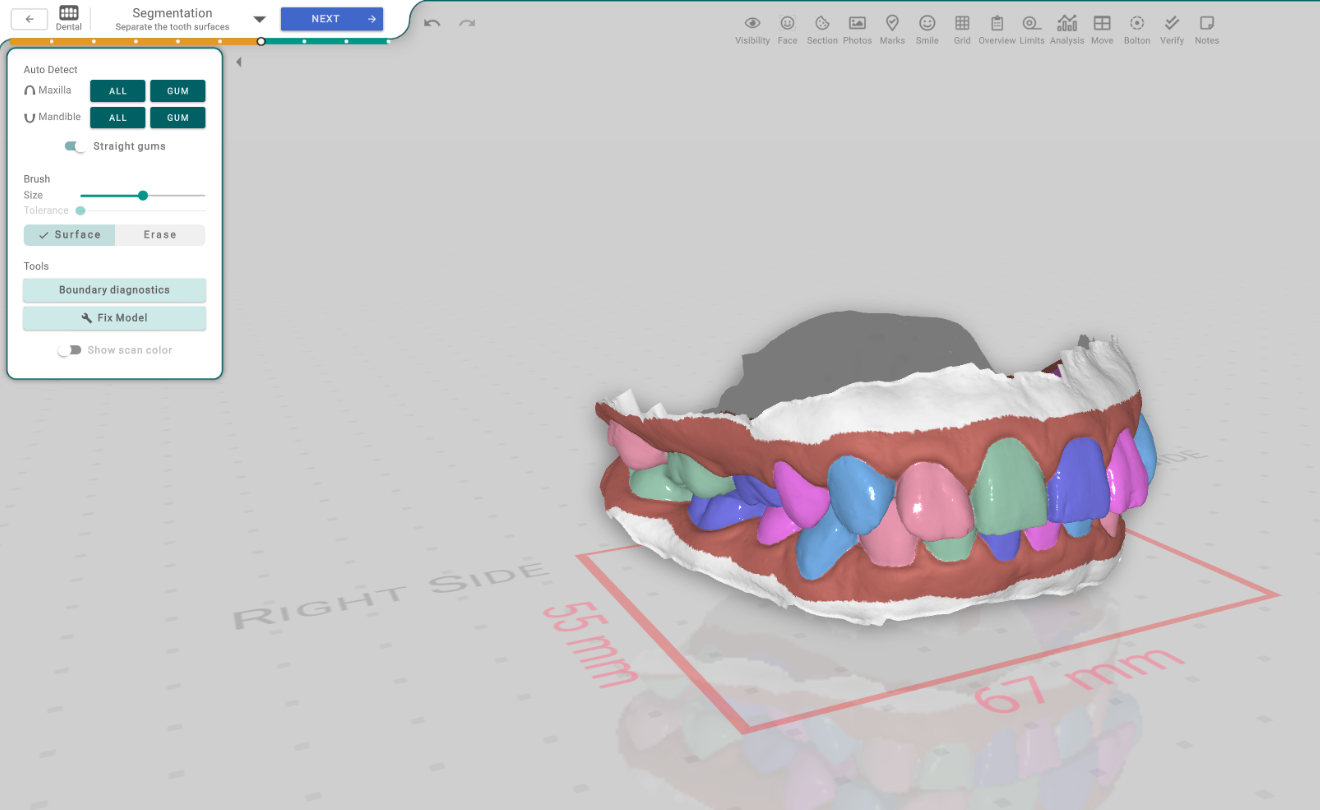
This step separates each tooth from the scan, so every tooth becomes its own surface you can move and reshape. Titan segments the teeth automatically, and you can touch up any boundary by hand with a brush. Each separated tooth takes its own colour so you can see the cuts.
Open it
In the 3D View, the Segmentation step — its header reads "Separate the tooth surfaces", right after Add Teeth.
Auto Detect
Let Titan find the boundaries for you, per arch:
- Maxilla / Mandible · All — separates every tooth on that arch.
- Maxilla / Mandible · Gum — detects the gum line on that arch.
- Straight gums — straightens the gingival line for a flatter gum margin.
Brush
Touch up a boundary by hand:
- Size — how big the brush is.
- Surface / Erase — choose whether you're adding tooth surface or erasing it, then paint on the model.
- Tolerance — shown here but not active in this build (it has no effect).
Tools
- Fix Model — opens the scan-repair step to clean the mesh.
- Show scan color — shows the scan's own colours instead of the per-tooth segmentation colours, so you can check the surface.
- Boundary diagnostics — an advanced, development-only button (it re-runs the boundary for a selected tooth) and won't appear in the released app.
Good segmentation matters for the next step: it gives the AI the detail it needs to name and number the teeth. You can move on once the boundaries look right.