Setup
This is where the treatment takes shape: you move each tooth to its final planned position. The step header reads "Setup — Move the teeth to final position." When you open it, Titan jumps the timeline to the last aligner and faces the model front, so you are looking straight at where the teeth need to end up. The treatment tools you use here sit on the toolbar at the top of the viewer.
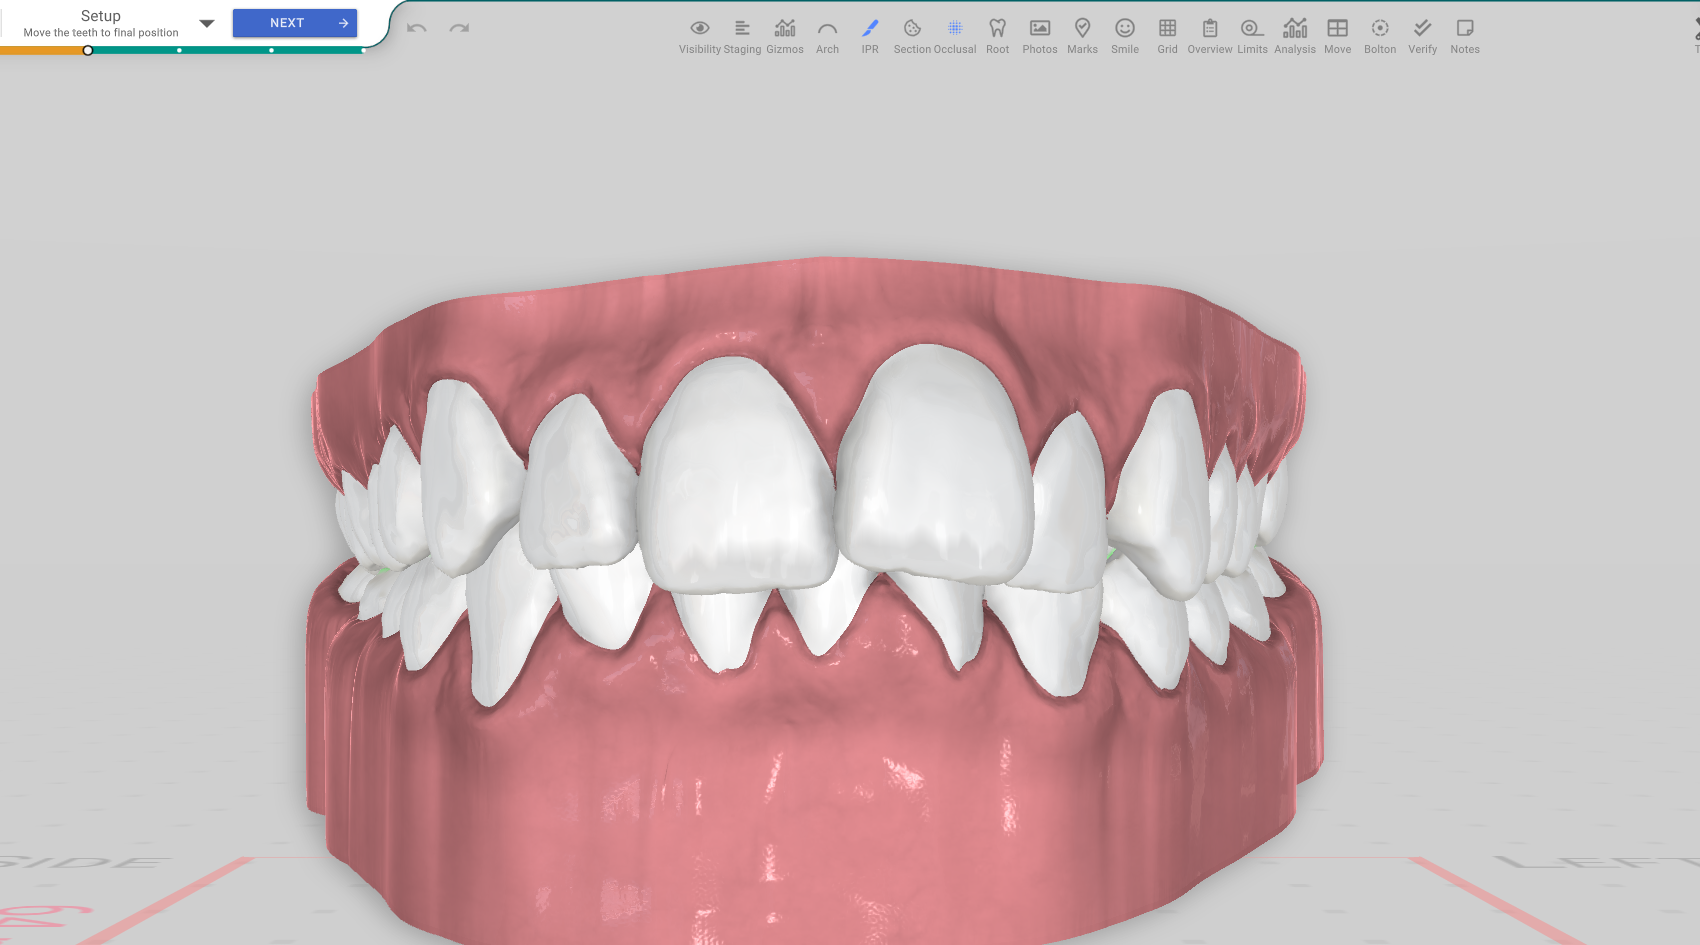
Open it
In the 3D View, the Setup step — its header reads "Move the teeth to final position", right after the Analysis / Diagnosis area. In this phase you can select the teeth, the ideal arch and the articulator, and the toolbar shows the treatment tools.
Move the teeth
Select a tooth and use the Move / Gizmos tool to move and rotate it into its final planned position. This is the heart of the phase — each tooth is placed where the finished treatment should leave it.
Arch
The Arch tool shows the ideal arch guide, a reference curve you can line the teeth up against as you position them.
IPR
The IPR tool handles interproximal reduction — the small amount of enamel taken from between teeth to make room. Open it to see and set the reductions between the teeth.
Occlusal contacts
The Occlusal tool shows how the upper and lower teeth meet, so you can check the bite while you move the teeth.
Root
The Root tool keeps the roots in view while you plan, so you can move a tooth with its root in mind, not just its crown.
Staging
The Staging tool opens the staging timeline, where the final positions you set here are broken into the individual aligner steps. Staging has its own page.
Good to know
- Setup opens with the timeline on the last aligner, so you are always editing the final planned position.
- The treatment tools (Move, Arch, IPR, Occlusal, Root, Staging) only appear in the treatment phases — that's why the toolbar looks different here than on the scan steps.
- When you've placed the teeth, NEXT takes you on to Staging.