Export STL
Export STL saves a treatment's printable models to files — STL for your own printer, or a LuxCreo, Graphy or Shell target — without placing a print order. Use it when you just want the files; to make a tracked, paid order, use Create a print order instead.
Open it from the treatment
On a treatment card, open its ⋮ menu and choose Export Stl. The treatment opens in the 3D viewer in Printing mode, and the Export STL action there opens the export panel.
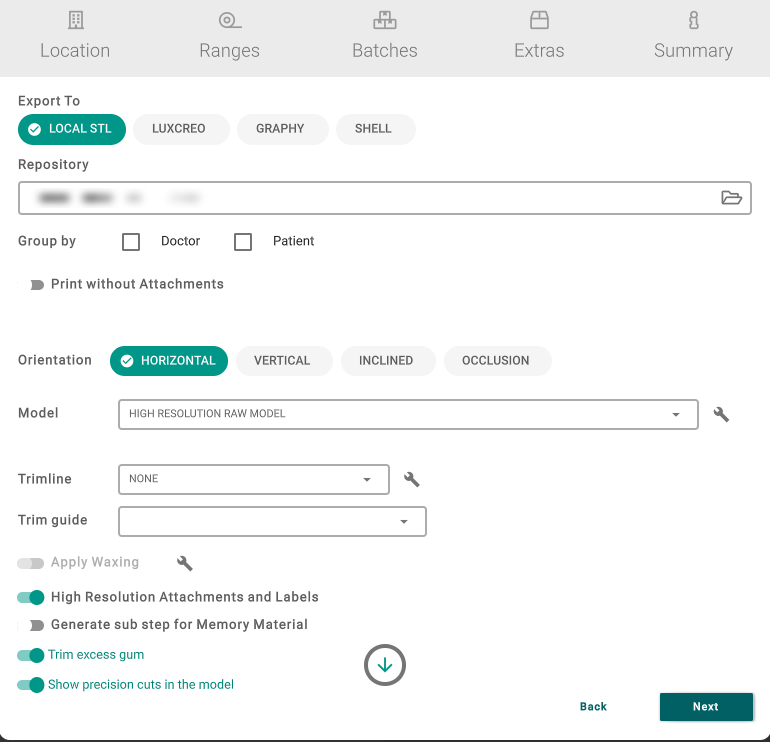
Export the models
- Pick a target at the top: Local STL, LuxCreo, Graphy or Shell. Only the targets your lab settings allow are shown.
- For Local STL, choose the Repository folder (Browse to pick one), and, if you want, group the export by doctor or patient.
- Set the options:
- Orientation — how the models sit on the print bed (Horizontal, Vertical, Inclined, Occlusion).
- Model — Raw (high resolution), Solid, or Hollow (Shell, Lattice, Hive, Triangle).
- Trimline — None, Baked, or a point-list file. - If you need to fine-tune the hollowing, the trimline, the trim guide or the wax-up, use the wrench next to that option. It takes you into the 3D viewer to set it up and closes the panel — reopen Export STL when you're done.
- Export. The files are written to your folder (or sent to the lab target).
Tips
- Export STL only makes files; it never places an order or shows up in the Printing queue.
- The Repository folder must exist, or you can't continue. If the field is highlighted, pick an existing folder with Browse.
- If an export fails to write, it's usually a very long folder path or no access to the folder. Choose a shorter, writable location.