Create a print order
The print order window is where a treatment becomes something you make: you choose what to produce, where to produce it, split it into batches, and pay. It's a short wizard — Location → Ranges → Batches → Extras → Summary → Payment. The same window can also just export STL files without placing an order.
Open it from the treatment
On a treatment card, open its ⋮ menu and choose Schedule Print. The print order window opens, already filled in from that treatment, on the Location step.
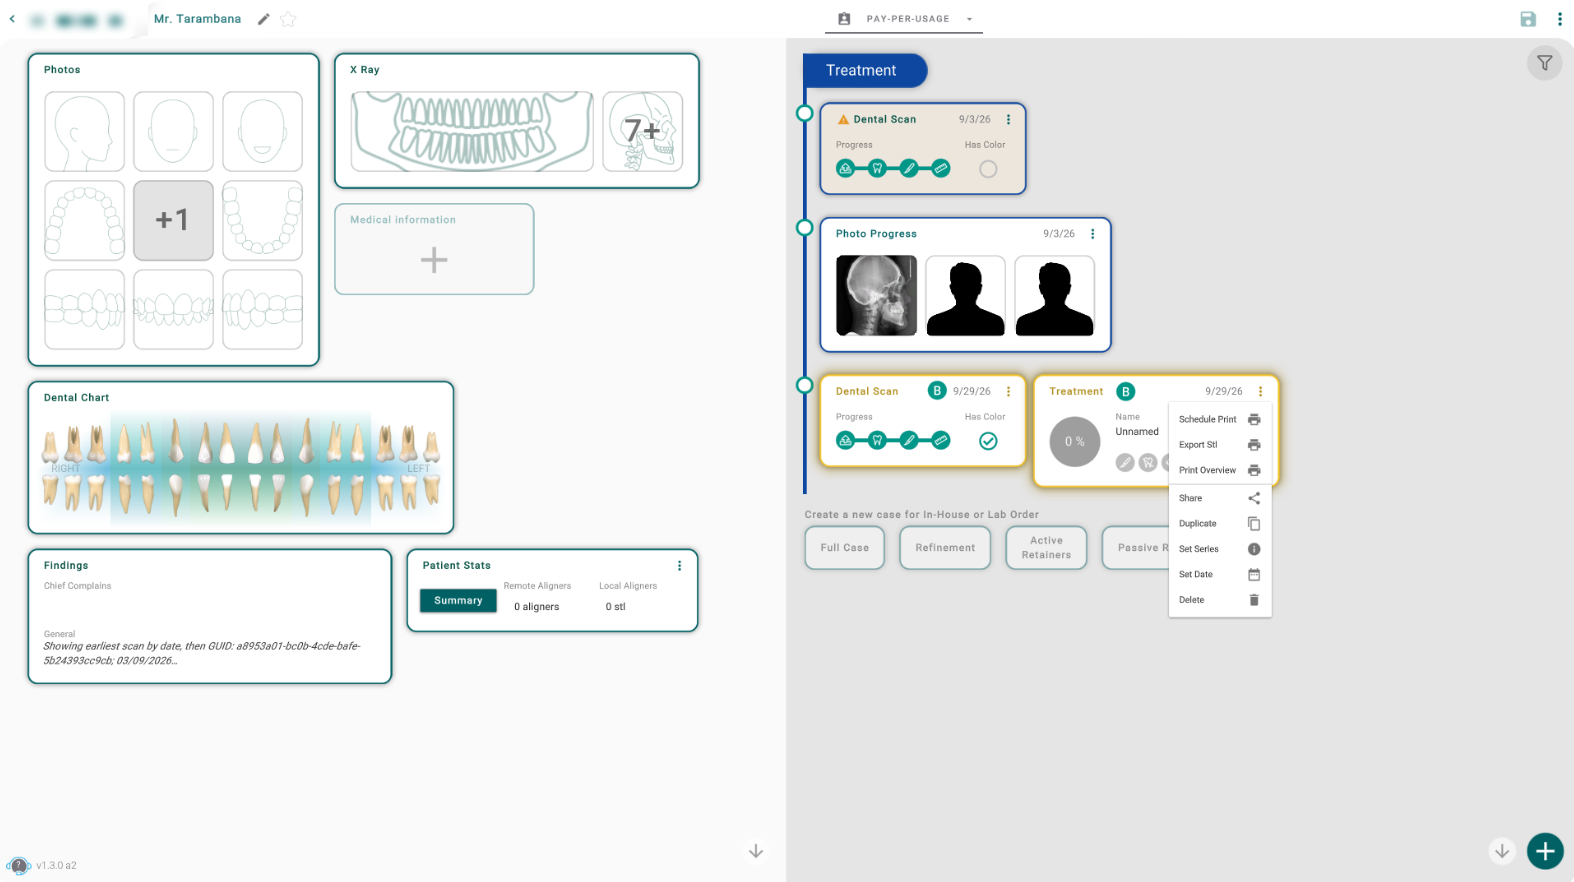
The same menu has two neighbours: Export Stl opens this window in export mode (files only, no order), and Print Overview prints a treatment letter — a document, not this window.
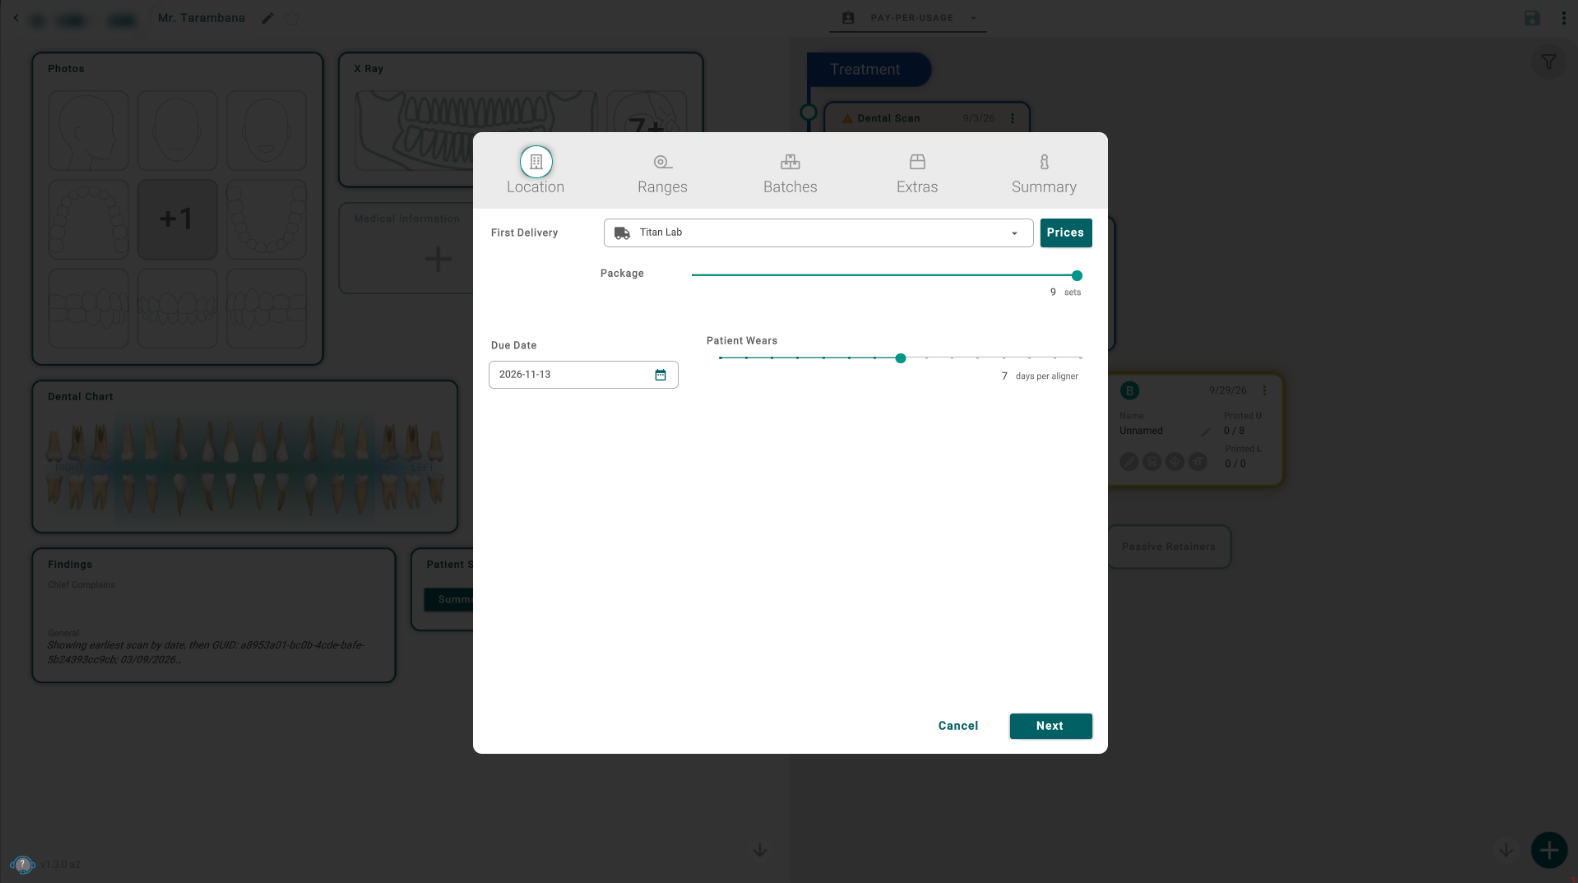
Place an order, step by step
- Location — pick the lab or your own office printer, the due date, the package options, and how long the patient wears each aligner. You'll see a price preview.
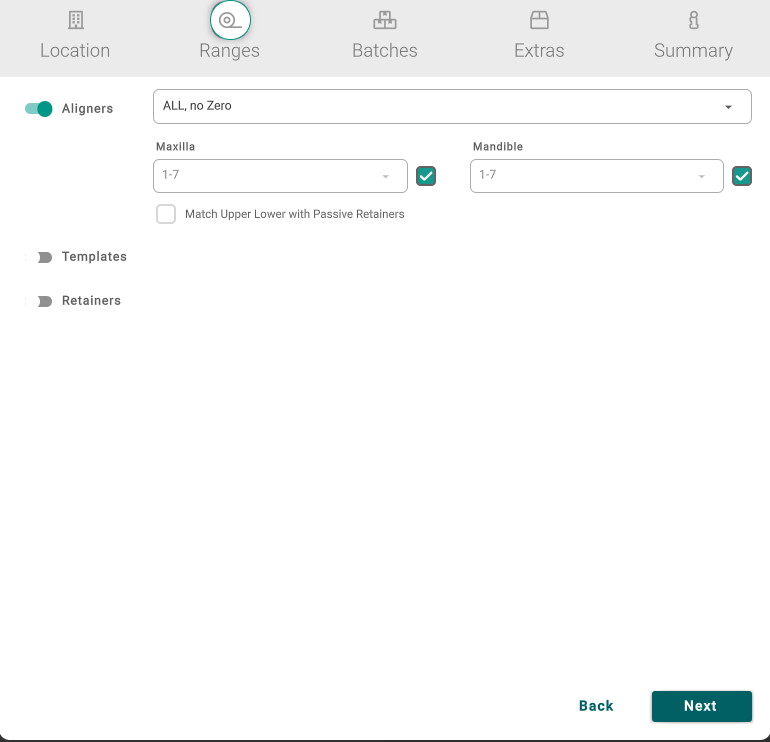
- Ranges — turn on what to make and set its range and material:
- Aligners, Templates, Retainers, and IB Trays (indirect-bonding transfer trays, shown only when the treatment has indirect bonding).
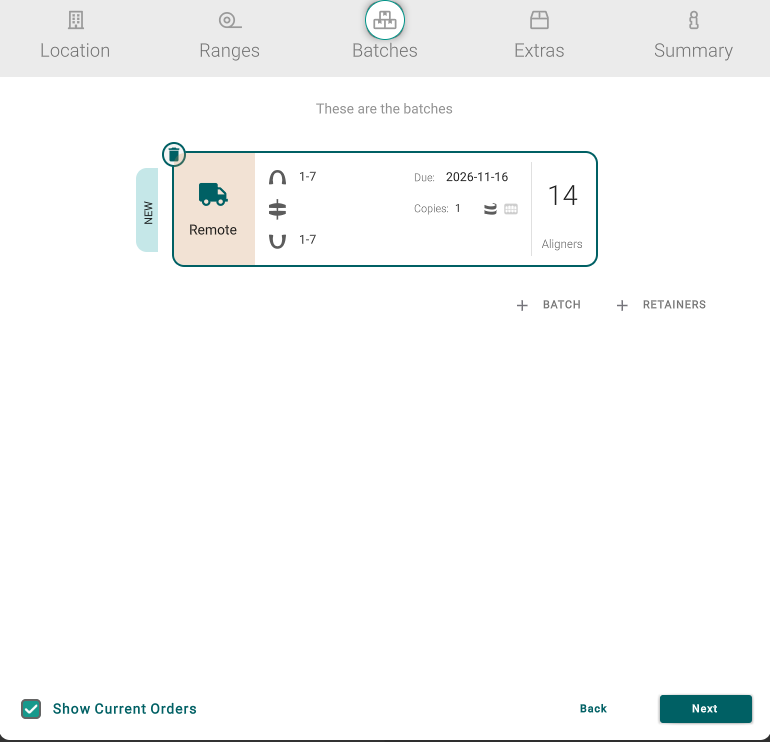
- At least one of these must stay on. - Batches — split the order into batches if you want. Each batch has its own due date and materials; you can add a batch or a retainers batch.
- Extras — print without attachments, and choose the Models and the Aligner Case.
- Summary — review the counts, add a note, and check the shipping address.
- Payment — review the order and pay to place it.
On Ranges you choose what to make and the range per arch:
On Batches you can split the order and set each batch's due date, materials and copies:
Just export the files
If you only need the STL files and don't want to place an order, choose Export STL instead of Print. It's the same window in export mode: pick the target (your computer or a lab), the models, trimline and trim-guide options, and export. No tracked order is created.
Tips
- You can't turn off the last thing to make — at least one deliverable stays on.
- A remote order needs a complete office address (street, city, country). If you can't submit, open Edit Address and fill it in.
- Orders sent to the Titan lab have a minimum batch size. If a batch is too small, add more aligners or combine ranges. Reprinting aligners you've already received is exempt.
- If the window says "Unable to load Treatment", open it from the plan or the treatment card rather than on its own.