Open and advance a print order
Once you've placed a print order, its Overview is where you follow it and move it through the stages of making it. You open an order from the Printing queue on the Doctor Dashboard, or from the treatment's printing card on a patient's dashboard.
The Overview has four parts: an information panel (lab, patient, ranges, materials, shipping address), a timeline of nine stages, a status table, and a step editor.
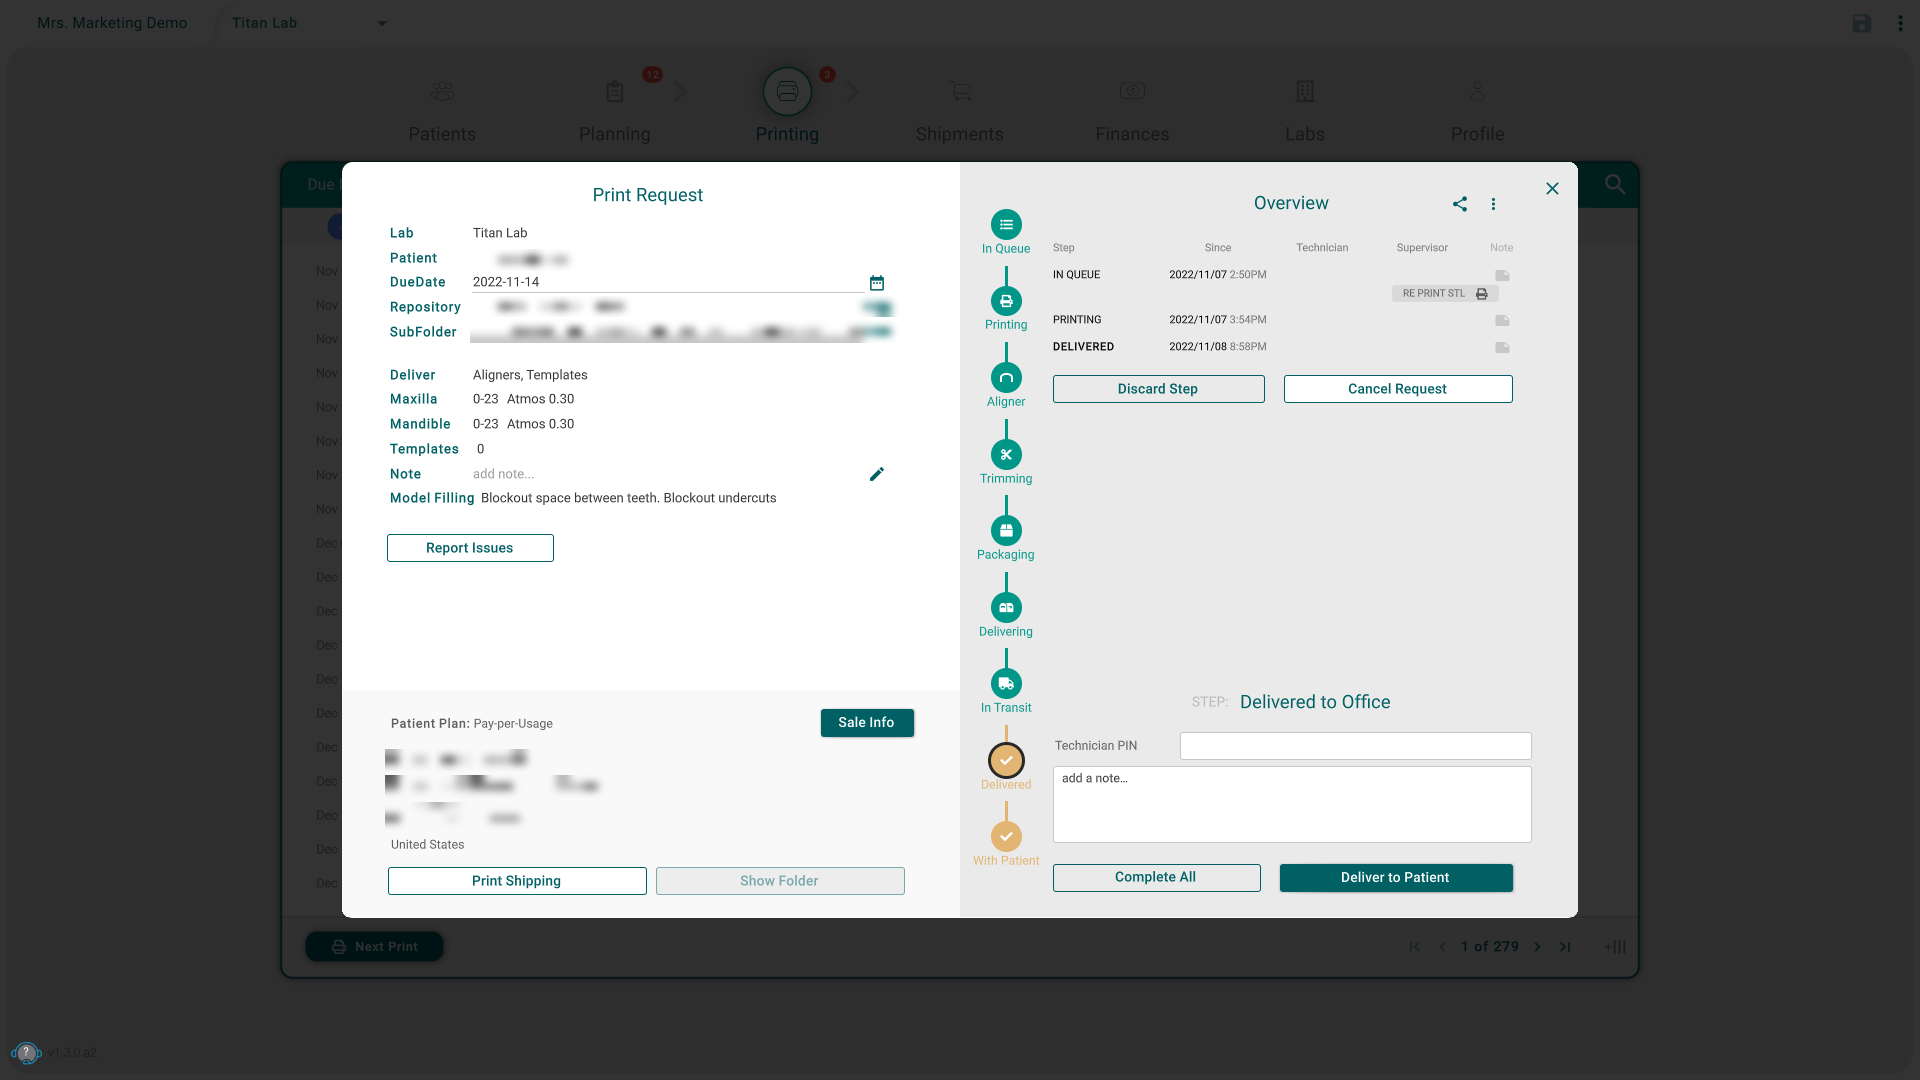
Follow and advance an order
- Read the information panel for the order's details and shipping address.
- Click a stage in the timeline, or a row in the table, to look at that stage.
- In the step editor, enter the technician and supervisor, and a note if you need one.
- Choose Complete Step to advance one stage, or Complete All to finish the remaining stages. At In Queue, Complete Step exports the models.
- When the order ships, add the tracking number and carrier, and print the shipping letter.
The nine stages
In Queue → Printing → Aligner → Trimming → Packaging → Delivering → In Transit → Delivered to office → With the patient. A green stage is done, the current stage stands out, and a gold stage is still ahead. A ring marks the stage you're looking at.
Tips
- Clicking a stage only changes what you're looking at — it doesn't advance the order. Use Complete Step or Complete All for that.
- For an order a remote lab prints, the office production stages (Aligner, Trimming, Packaging, Delivering) and the technician columns aren't shown. That's expected — the lab handles them.
- Complete Step at In Queue is labeled Export and stays disabled until the models can be exported. Set the repository first.
- Complete All turns off once the order has been delivered to the patient.
- Print Shipping and Show Folder appear only for an order your own office prints, once it's past In Queue.