Patients List
The Patients tab lists every patient of the selected office. Use it to find patients quickly, choose which details to show, mark patients with colored stars, keep a short note and an external ID for each one, and open a patient's dashboard.
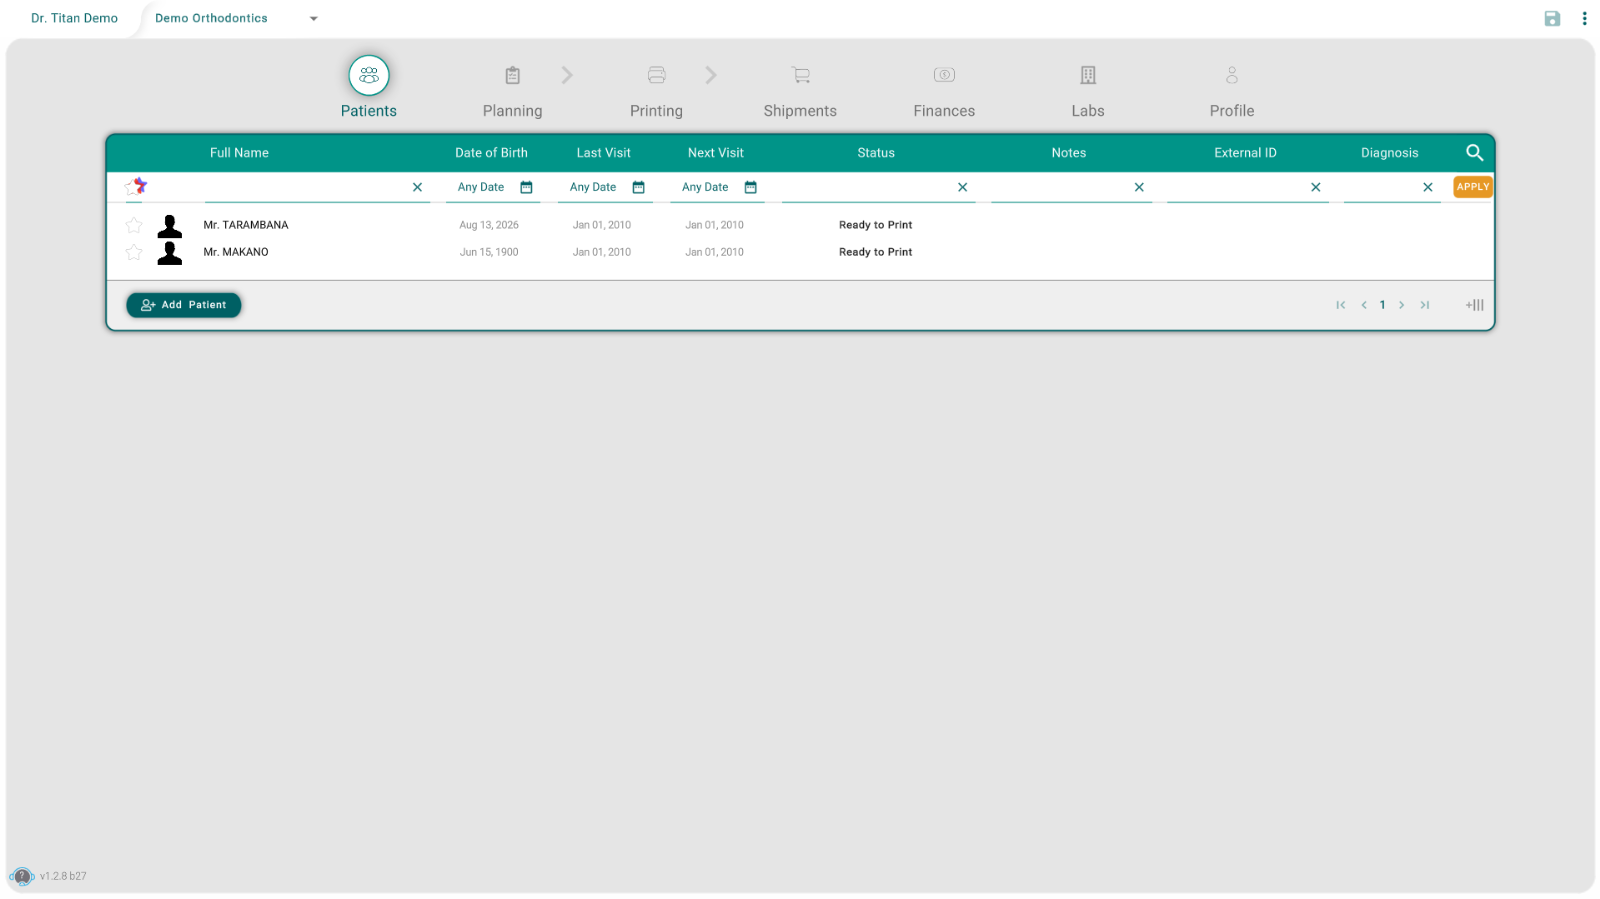
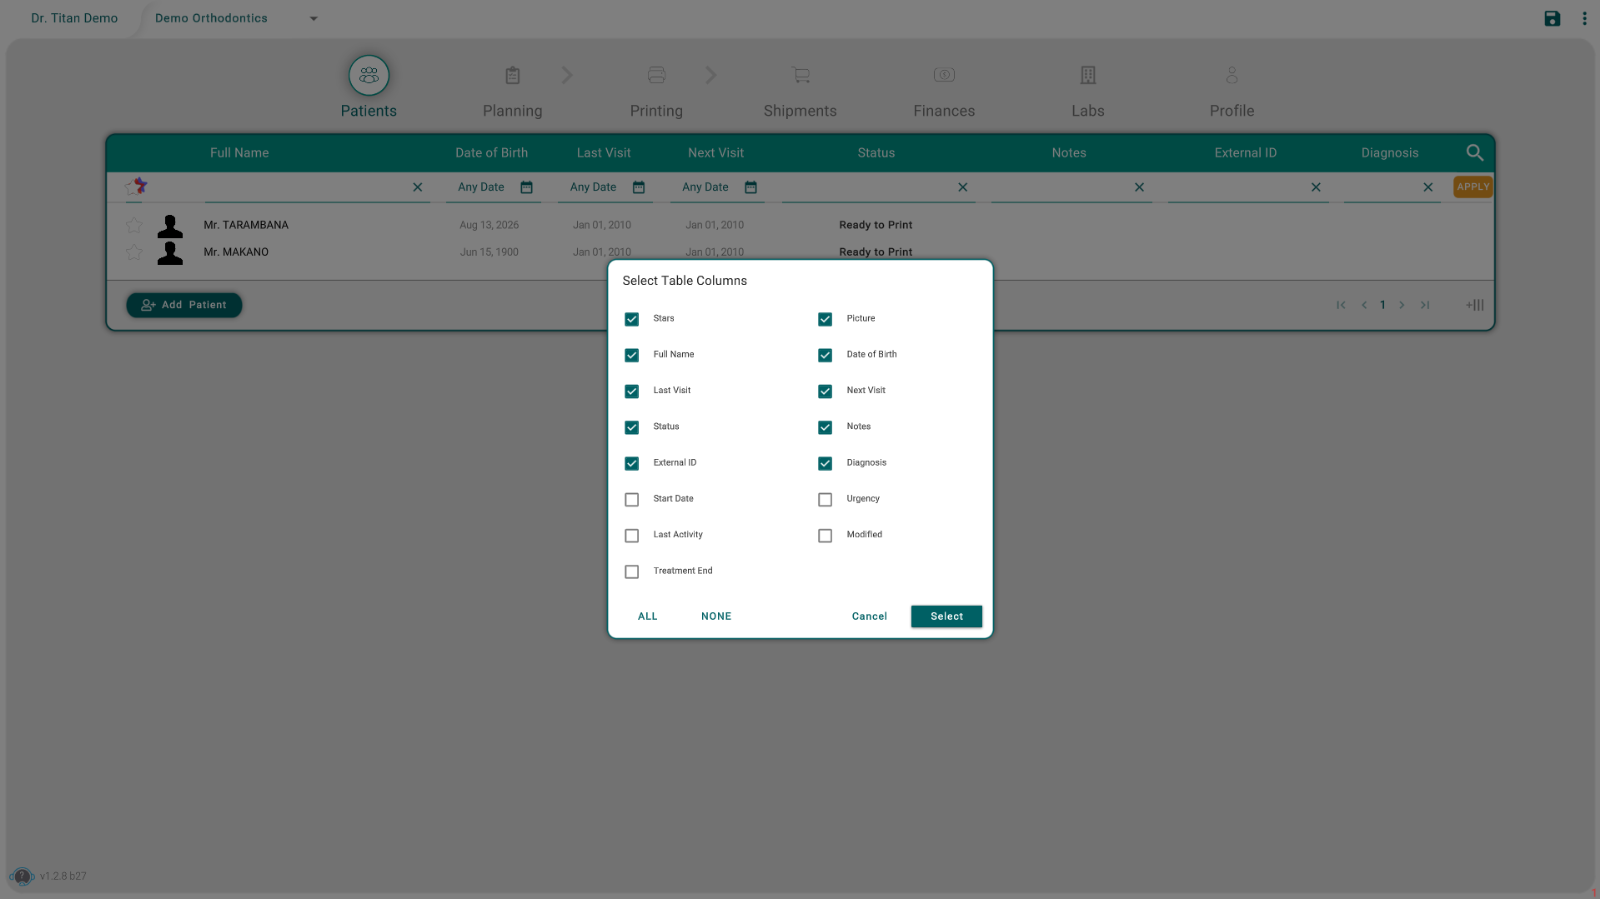
Show more columns
- Click the +||| button at the bottom right of the table.
- In Select Table Columns, tick the columns you want, such as Start Date, Urgency, Last Activity, Modified, or Treatment End. ALL ticks every column and NONE clears them.
- Click Select to apply, or Cancel to leave the table as it was.
Full Name is always shown.
Find and sort patients
- By name: type part of the name in the filter box under Full Name. Click the ✕ in the box to clear it.
- By any column: each column has its own filter box.
- By recent activity: show the Modified column, then use its date filter ("Any") to pick Today, Yesterday, Last Week, Last Month, Last Year, or a custom range. It looks at the last activity on each patient's record, not at visit dates.
- Sort: click a column name to sort by it. Click again to reverse the order.
Label patients with stars
- Click the star at the start of a patient's row.
- Pick a color: blue, cyan, green, yellow, or red.
The colors mean whatever your office decides. For example, red could mean "prioritize", yellow "waiting for aligners", and green "on track".
Notes and external IDs
- Click a patient's Notes cell to write a short reminder, such as "Need to rescan on next visit".
- Click the External ID cell to store the patient's number from another software you use, so both systems stay matched.
Open a patient
Click the patient's name. The Patient Dashboard opens with their photos, X-rays, medical information, dental chart, and treatments.
Tips
- A patient is missing? Clear the filters, set the date filter back to Any Date, and check the office at the top.
- Can't add a patient? Select an office first. Adding patients also depends on your role. See Add Patient.