Workspace
The Workspace group of Settings holds the defaults you work with every day: how teeth are numbered and shown, your treatment defaults, where models print and with which materials, and the names of the stage star ratings.
Open it from the account menu: ⋮ → Settings, then Workspace in the left navigation.
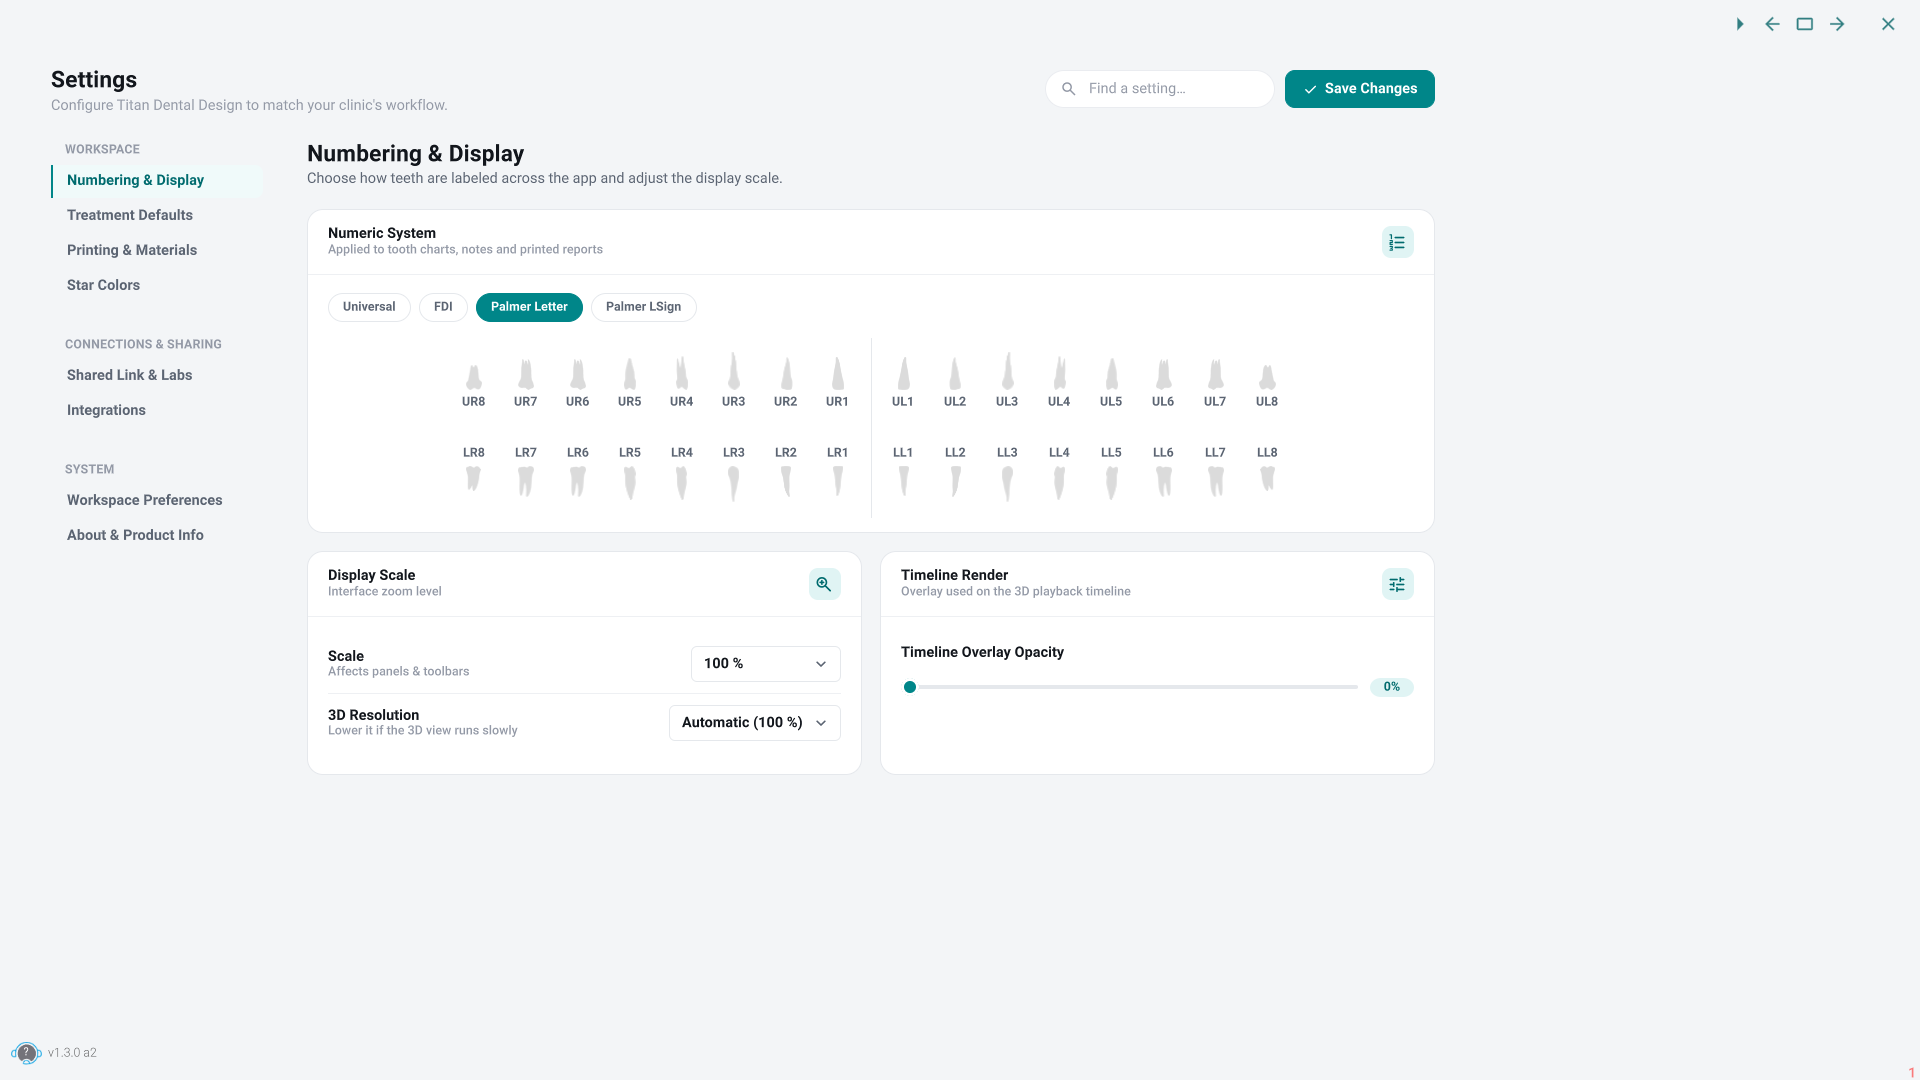
Numbering & Display
- Numeric System: choose how teeth are numbered — Universal, FDI, Palmer Letter, or Palmer with the quadrant sign. The tooth chart below updates to show the numbering you picked.
- Display Scale: the interface scale and the 3D viewer resolution. Leave the resolution on Automatic unless the viewer feels slow.
- Timeline Overlay Opacity: how strongly the timeline overlay is drawn during playback. (This control lives on the Numbering & Display panel, though it affects playback.)
Treatment Defaults
These are the starting values for every new treatment:
- Movement Limits: the profile and per-tooth limits (translation, extrusion, torque, tipping, rotation), days per aligner, and whether limits are read as distance or speed.
- Batch Size: how many aligners go in the first and the following batches, for full cases and for refinements.
- Attachments & Extractions: the aligner at which attachments start and extractions are delayed, plus overcorrections and passive aligners.
- Presets: your preferred bite ramps, trimline, shell, hollowing, trim guide and wax-up presets, and the default IPR limits.
Printing & Materials
- Printing Repository: the folder printed models are saved to, and whether they are grouped by doctor and by patient.
- Model Generation: the gingiva trim margins (lingual and buccal).
- Materials: the default material for aligners, templates and retainers, with Edit Material Options for the details.
- HTML Templates: the templates used for documents, orders and labels.
Star Colors
Rename the six stage star ratings (White, Red, Green, Blue, Yellow, Cyan) to words that mean something to your office. The names appear wherever a plan or patient shows its star.
Saving
Changes are kept when you click Save Changes at the top, or when you close the window. Save Changes is greyed out until you change something. Some of these settings apply to your whole office and others only to you; if a colleague doesn't see a change you made, that may be why.