Analysis
The Analysis step is where you study the case against cephalometric and facial norms laid over the aligned face and dental scan. Its side panel, Ceph Analysis, lets you pick a norm, fit it to the patient, and switch the analysis overlays on and off. Entering the step also opens the Diagnosis popup, where the case's findings are reviewed. What each norm actually measures — Steiner, Ricketts, McNamara, Wits and the rest — is covered in the cephalometric analysis manual; this page is about running the panel.
Open it
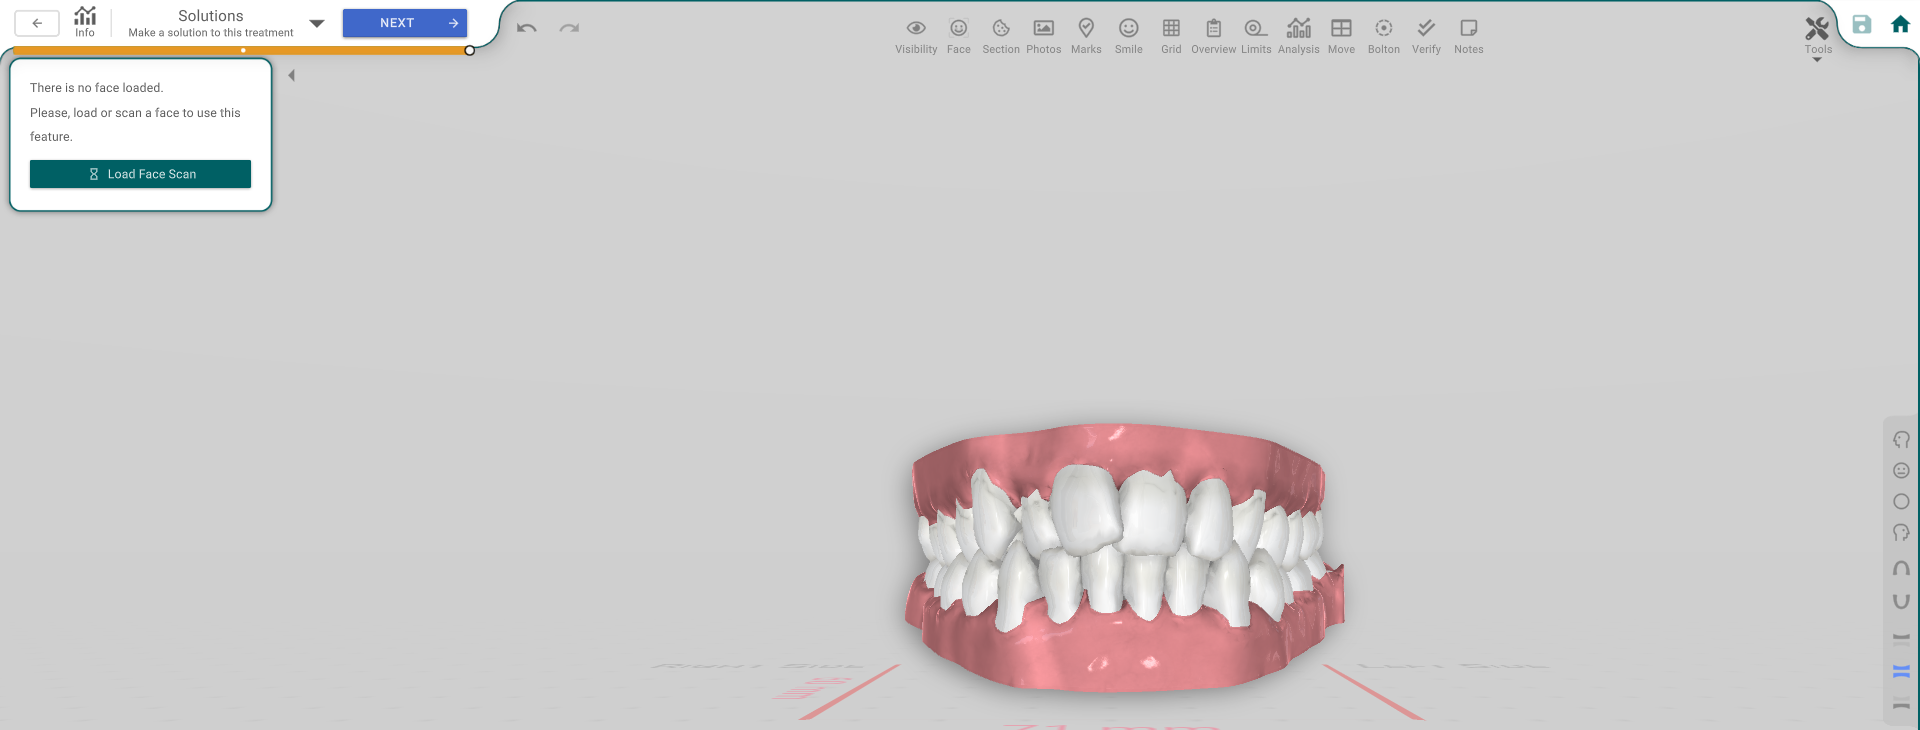
In the 3D View, choose the Analysis step. The Ceph Analysis panel is docked to the side of the viewport, and the Diagnosis popup opens on its own. The panel needs a Face Scan aligned with the dental scan: until one is loaded it shows a message and a Load Face Scan button. Load or scan a face, and the panel fills in with the Target, Norm and Analysis sections described next.
The panel, button by button
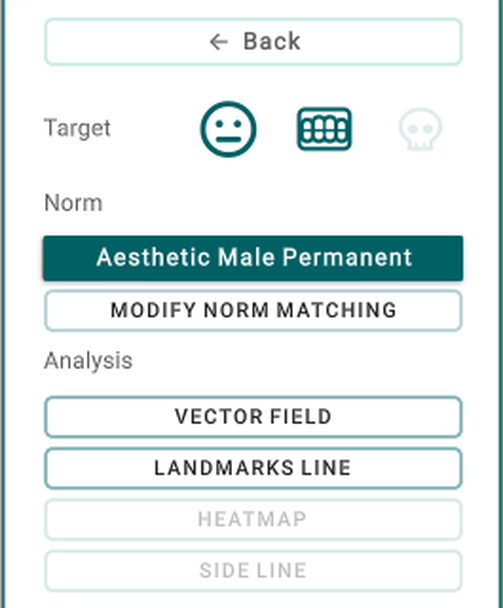
- Target — which the Show Face / Show Dental toggles below act on; Show Ceph is shown for reference and is not a button you press.
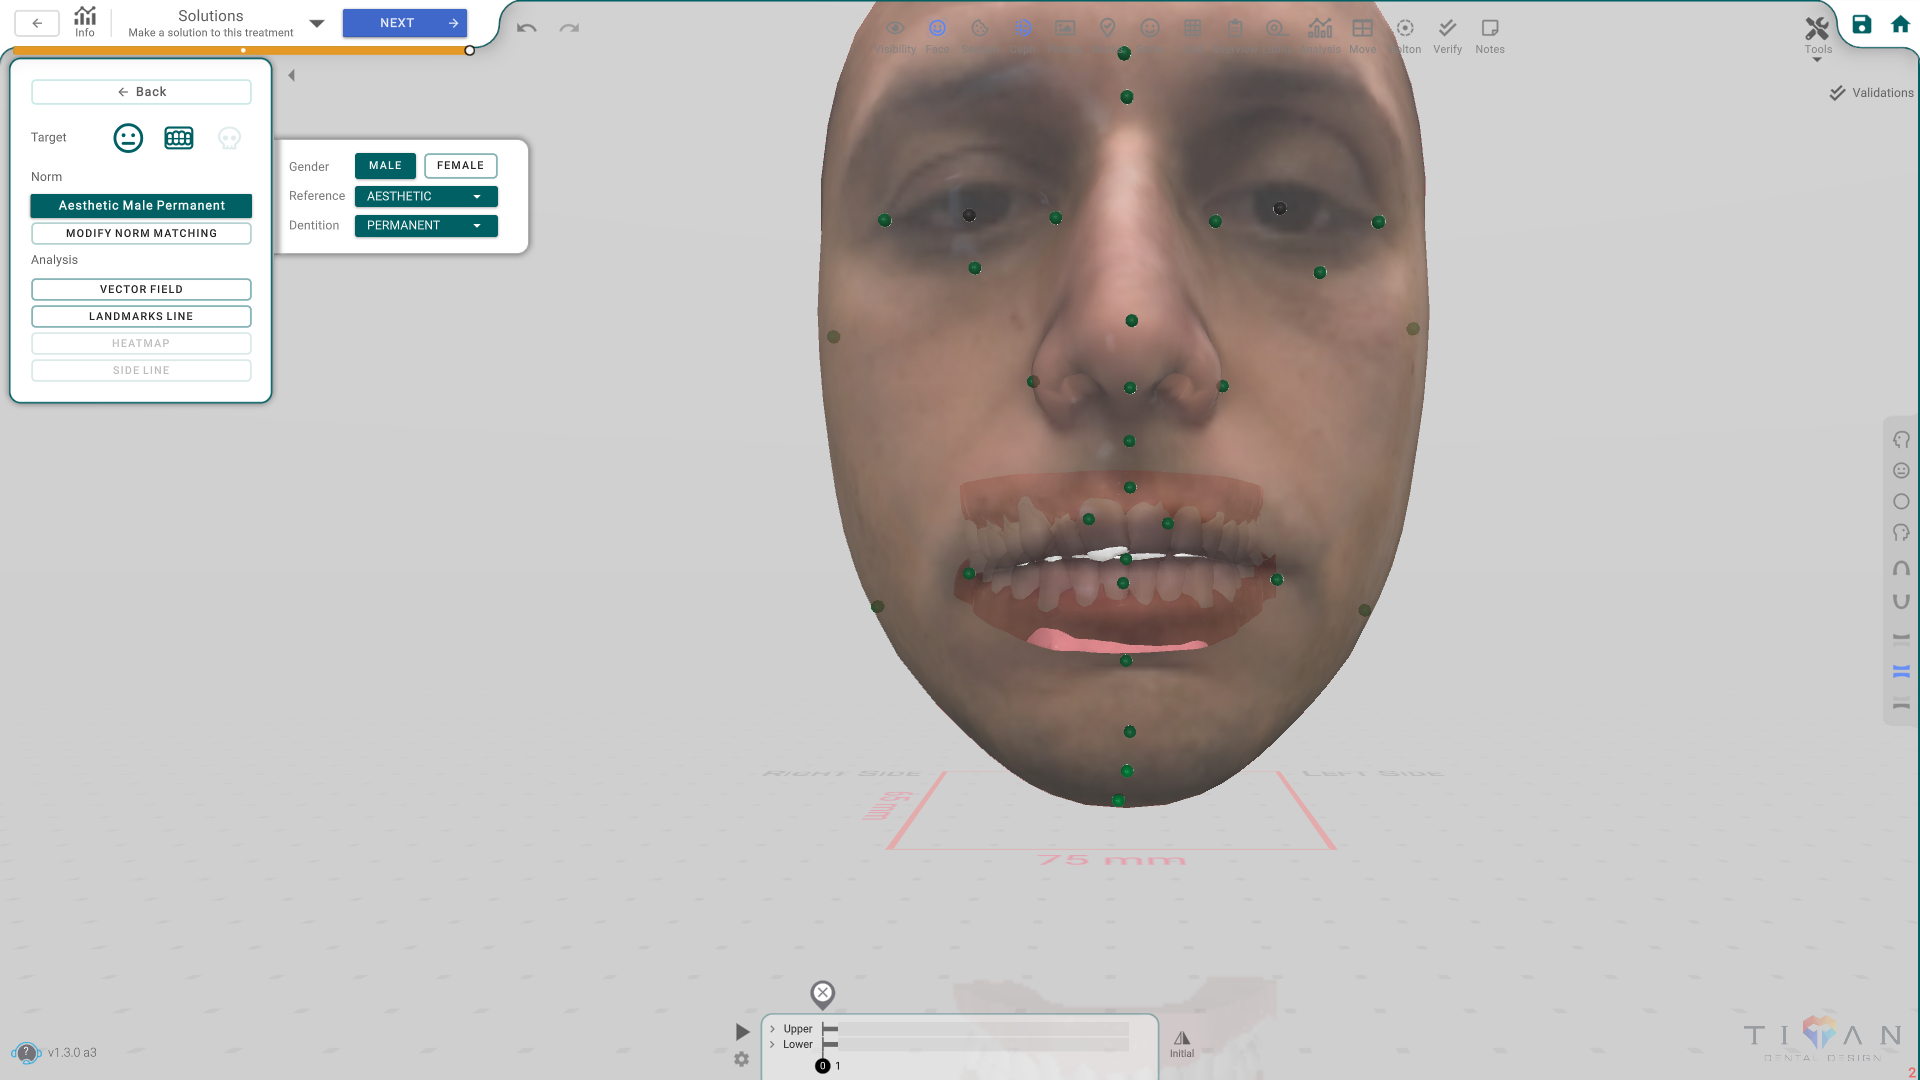
- Select Norm — opens the norm popup: Gender (Male or Female), Reference group (Caucasian, African, Hispanic, Asian or Aesthetic) and Dentition stage (Primary, Early Mixed, Late Mixed or Permanent). The button then shows the current norm's name.
- Modify Norm Matching — turns on a set of offset sliders (Forward, Up, Right, Tipping, Rotation) to nudge the norm into place; turn it off to hide them.
- Vector Field / Landmarks Line — the overlays you turn on and off.
- Heatmap / Side Line — shown for reference only; they report their state but are not switches.
Press Select Norm to open the norm popup.
With Modify Norm Matching on, press Recompute Matching to let Titan re-fit the norm, and Modify Dental Alignment to re-fit the dental alignment to the matched norm.
Good to know
- The analysis is a study aid: picking a norm and adjusting its matching changes what is drawn and how the norm is fitted — it does not move teeth on its own.
- Editing the diagnostic findings happens in the Diagnosis popup, which this step opens for you — see Diagnosis.
- To take a reading on the model — a width, a distance, Bolton, arch length — use the measurement tools; see Measurements.
- In the Diagnosis sub-step, Go to Face jumps you back to the face step to revisit the scan.