Trimline
The trimline is the edge of the aligner where it is cut around the gums. The Trimline step is the first printing step, where you shape that line — how far it comes down the teeth, how it curves, and how it fits around the frenum — before the models go to print.
Open it
In the 3D View, go to the Trimline step ("Adjust the trimline for print"), the first printing step after Ready.
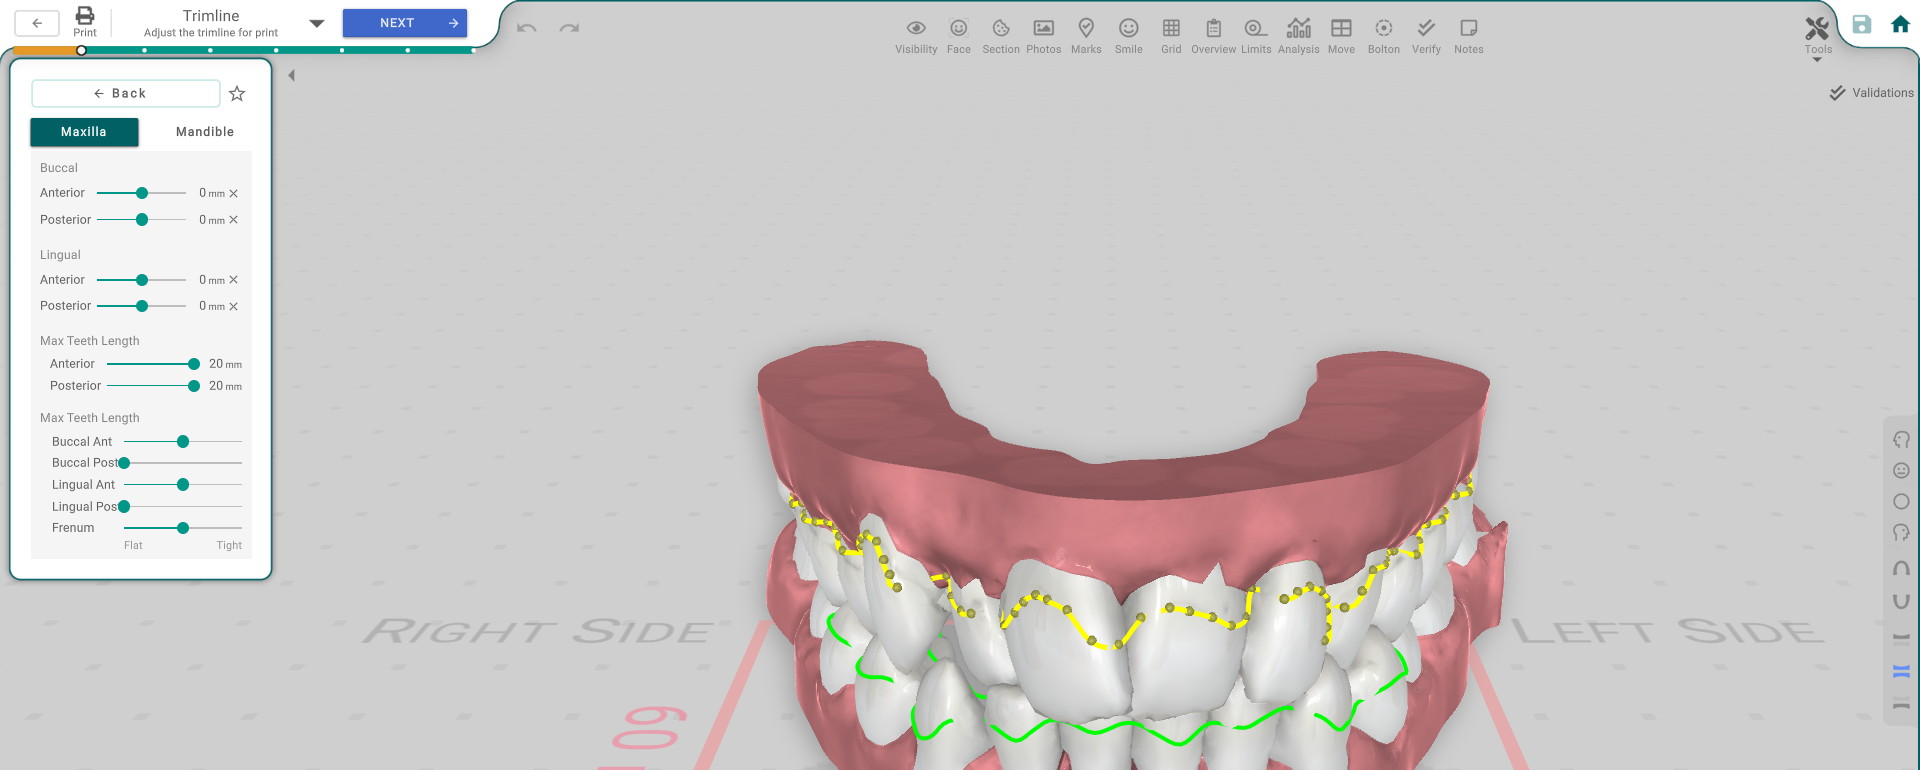
Pick the arch
Use the Maxilla / Mandible tabs to choose which arch's trimline you're editing — the sliders act on the selected arch only.
Shape the line
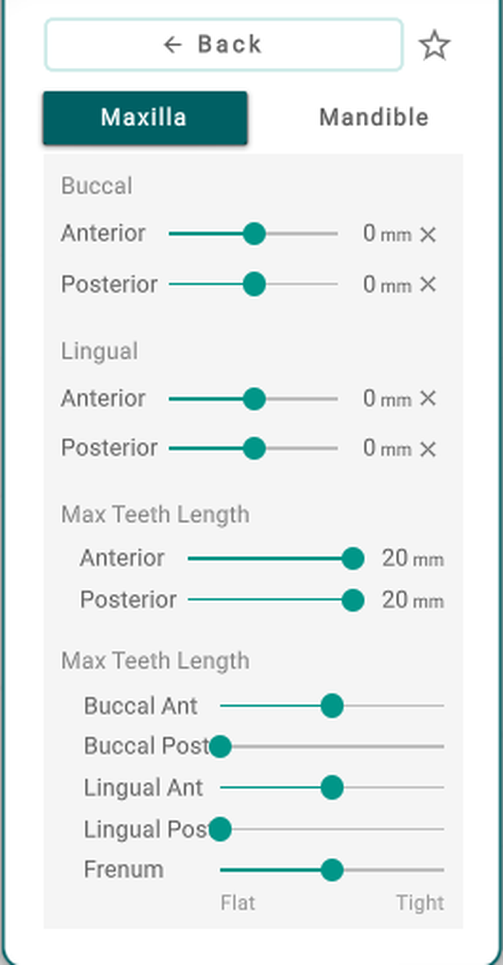
- Maxilla / Mandible — which arch's trimline the sliders below act on.
- Buccal — Anterior / Posterior — padding on the outer (cheek) side; the × resets a padding.
- Lingual — Anterior / Posterior — padding on the inner (tongue) side, each with its own ×.
- Max Teeth Length — Anterior / Posterior — how far down the teeth the aligner covers.
- Max Teeth Length (curvature) — Buccal Ant / Buccal Post / Lingual Ant / Lingual Post — the curve of the trimline in each quadrant.
- Frenum — slide between Flat and Tight for how closely the line follows the frenum notch.
Favourites
The ★ at the top saves the current trimline setup, or recalls a saved one, so you can reuse it on other cases.
Good to know
- Want a straight trimline instead of scalloped? Set every Curvatures slider to flat (0°) for that arch.
- Trimline shows a double line? This happens after drawing most of it by hand. Move the sliders again to reset it from them, and touch up only small areas by hand.
- No room to draw a straight line; it comes out scalloped? The scan is short on gum in that area — go back to Segmentation and extend the gum, for example on the palatal side.
- The green line on the model is the trimline — watch it as you move the sliders.
- The trimline is edited per arch; switch the tab to do the other one.