Scan cards
A patient's scans live in the cases of the Treatments panel. Each case is built on one dental scan. A case's face scans and CT scans are in its records.
Bring in a scan
- In the Treatments panel, under Create treatment, click Import, then Face Scan or CT Scan.
- For a dental scan, click the green + button in the bottom-right corner, then Dental Scan.
The 3D view opens, where you bring the scan in and work on it. A new dental scan starts a new case.
Design a plan from a dental scan
A case with only its scan shows "Dental Scan ready to start treatment". Click Design plan to open the scan in the 3D view.
Manage the dental scan
- Open it: click the case's Scan step, or Design plan while the case has only the scan.
- Change its date or delete it: in a case with only the scan, the ⋮ beside Design plan has Set Date, Set Series and Delete. Once the case has a plan, its row's ⋮ has Set scan date, and Delete removes the scan with its only treatment.
- Change its series: click a plan's series letter. The letter belongs to the scan, so every plan in the case changes with it.
The Scan step shows the capture date, and "color" when the scan has color.
Open a face scan or a CT scan
- In an open case, click the records fold, for example 2 records.
- Click a Face Scan or CT Scan row. It opens in the 3D view.
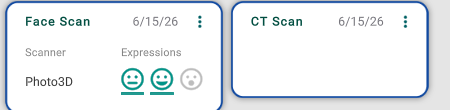
The row's ⋮ has Set Date and Delete. A face scan row shows which captures it has: Neutral, Smile and WideOpen. A patient with no case yet shows these scans as rows of their own.
Good to know
- You can't delete a dental scan while a printed treatment or a planning uses it. If its treatments were never printed, Titan offers to delete them with the scan.
- Set Date and Delete need permission to modify the patient's files. Set Series needs permission to modify treatments. If nothing happens, ask your office manager.