Hollow
The Hollow step hollows out the printed model so it uses less resin. It's one of the printing steps.
Open it
In the 3D View, go to the Hollow step, one of the printing steps.
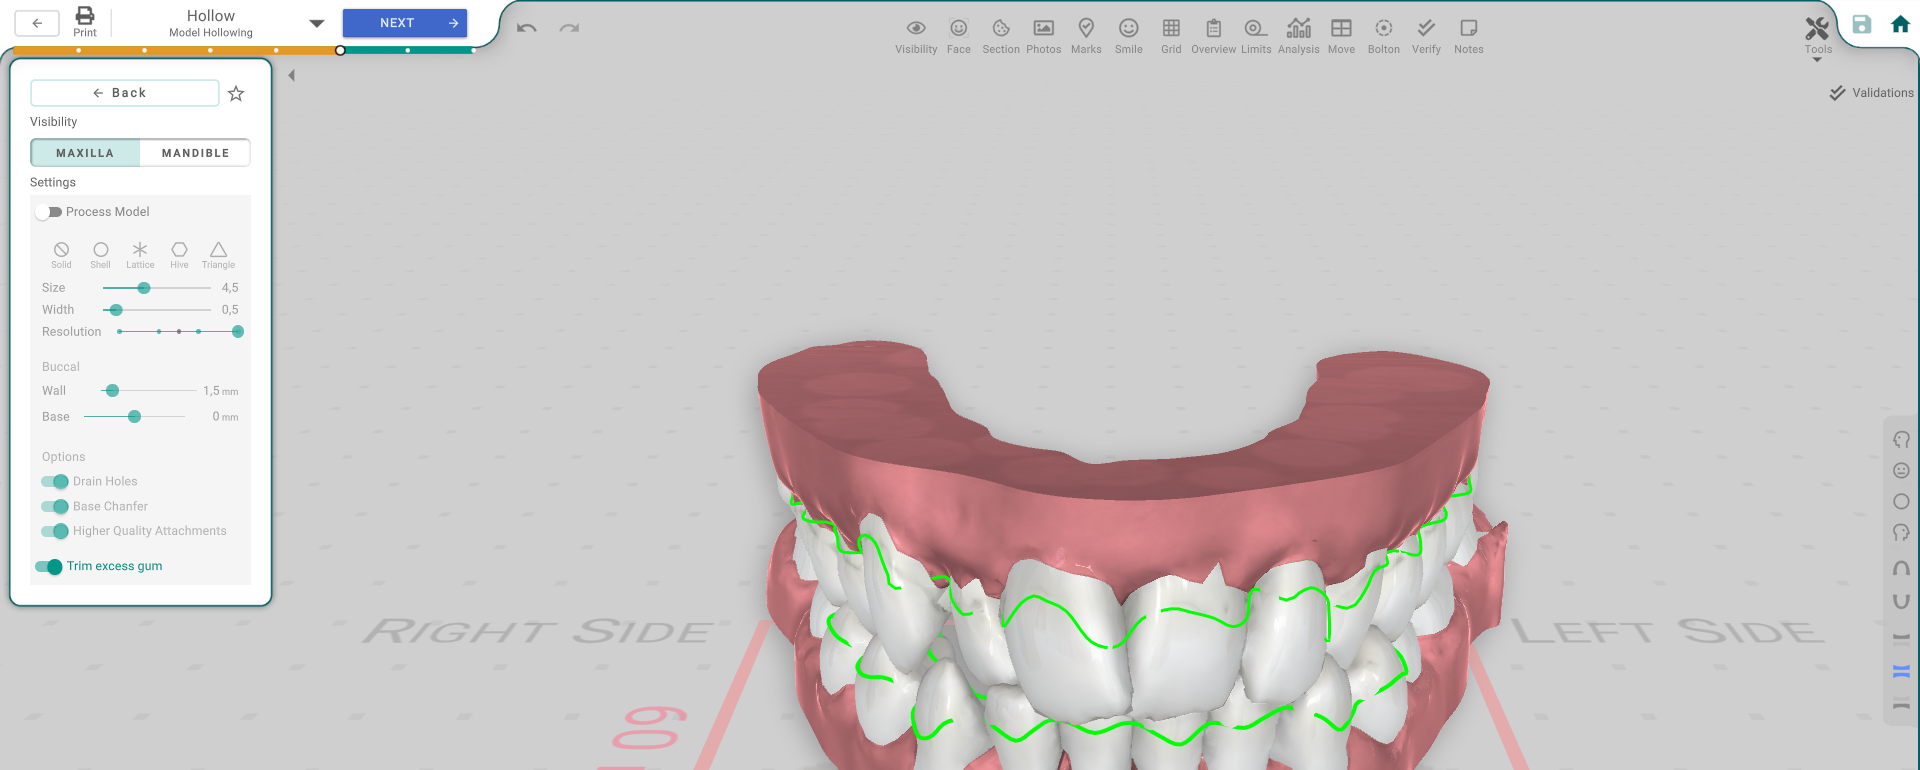
The panel, button by button
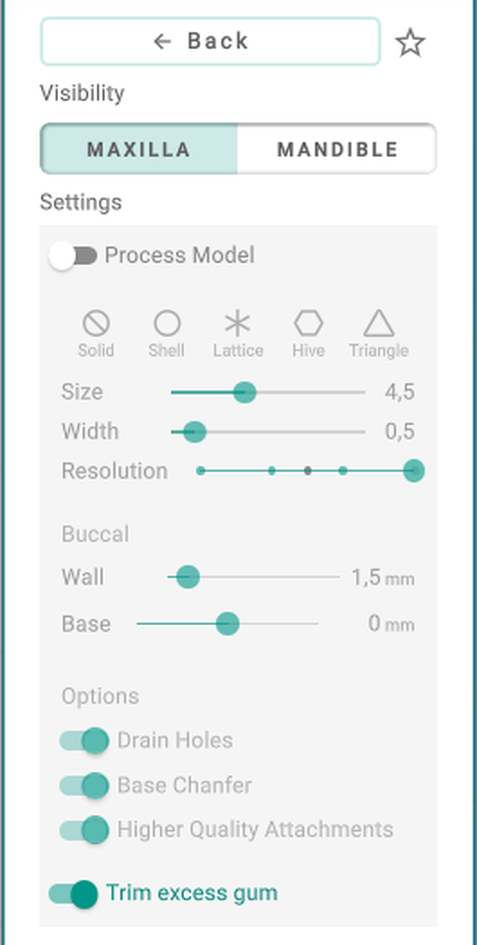
- Maxilla / Mandible — which arch the settings below act on.
- Process Model — turns hollowing on.
- Solid / Shell / Lattice / Hive / Triangle — the fill pattern.
- Size — the internal structure's cell size (Lattice, Hive, Triangle).
- Width — the structure's strut width.
- Resolution — the detail of the hollow mesh.
- Wall — how thick the buccal wall is.
- Base — how much of the base stays solid.
- Drain Holes — adds holes so trapped resin can drain out.
- Base Chamfer — rounds the base edge.
- Higher Quality Attachments — keeps attachment shapes crisp through the hollowing.
- Trim excess gum — trims the gum off the hollowed model.
The ★ saves the current hollow setup or recalls a saved one.
Good to know
- The hollow is set per arch — switch the tab to do the other one.
- Every change rebuilds the hollow, so it may take a moment on large models.