Timeline
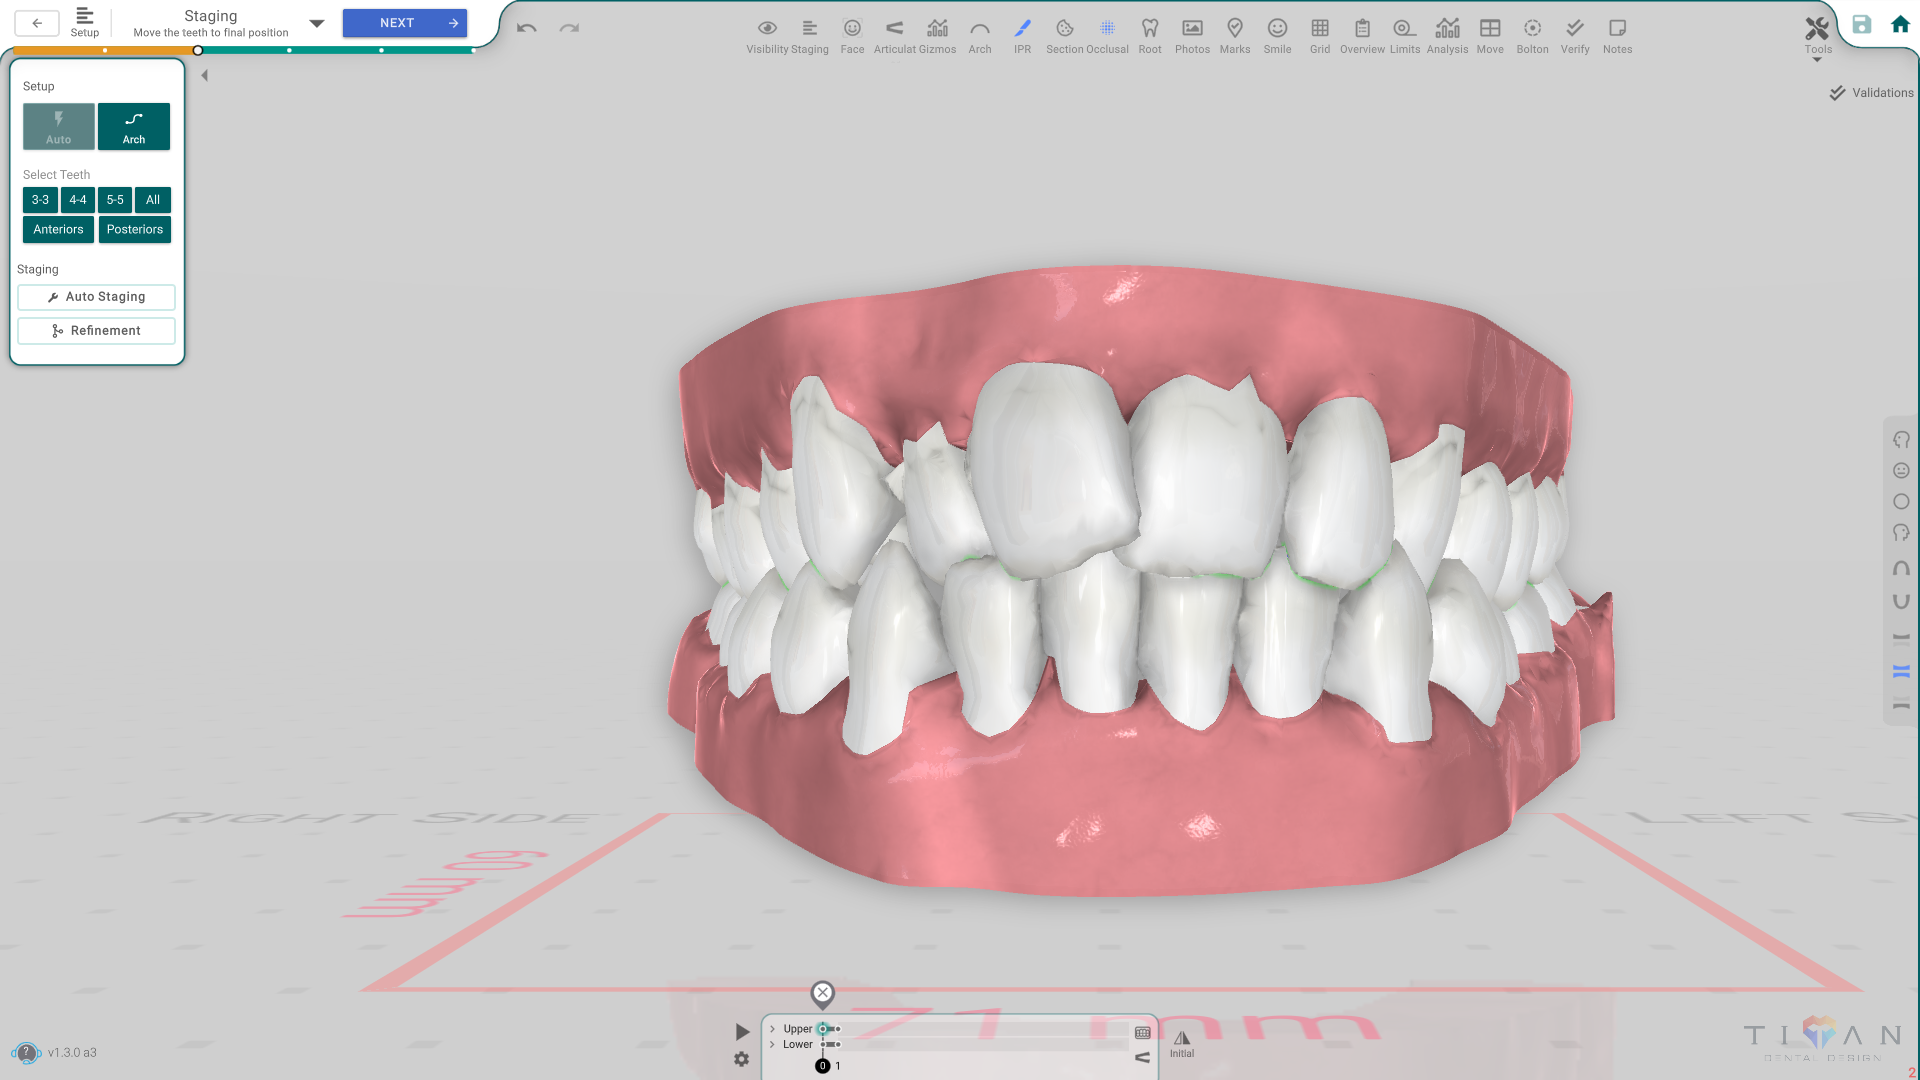
The Timeline is the bar along the bottom of the 3D viewer. It represents the plan as a sequence of aligner steps: every tooth has its own row of keyframes, and each keyframe is a position the tooth is at by a given aligner. Scrubbing the Timeline doesn't just preview the plan — it's the same data Setup, Staging and Overcorrections write to, and the same data that gets exported and printed.
What it represents
- Each row is one tooth (or, collapsed, a whole arch). A row's bar runs from aligner 0 to the last aligner that tooth has a keyframe on.
- A keyframe (the diamond markers) is a saved position — where that tooth is at that aligner. Between two keyframes, the tooth's position is interpolated.
- The Initial marker is aligner 0, the scan's starting position. Every tooth starts here, whether or not it has its own keyframe there.
- The numbers along the bottom are aligner steps, not days or weeks — step 1 is the first aligner the patient wears.
Open it
The Timeline is part of the 3D viewer in the treatment phases — Setup, Staging, Overcorrections and a few others. It's visible by default; press the ✕ to close it, or Staging on the top toolbar to bring it back.
The panel, button by button

- Upper / Lower — one row per arch, collapsed by default. Click the › to expand an arch into its individual teeth.
- Play — runs through the aligner steps from the current position.
- Settings (gear) — opens the Auto Staging panel (see Auto Staging).
- The numeric field — type an aligner number to jump straight to it.
- Synchronize — the icon on the right switches whether teeth move together or independently; see Synchronized vs. per-tooth below.
- 0 / 1 under the time slider — the current aligner you're scrubbed to, shown as a draggable marker.
Working with keyframes
Expand an arch and select a tooth to see its own row.
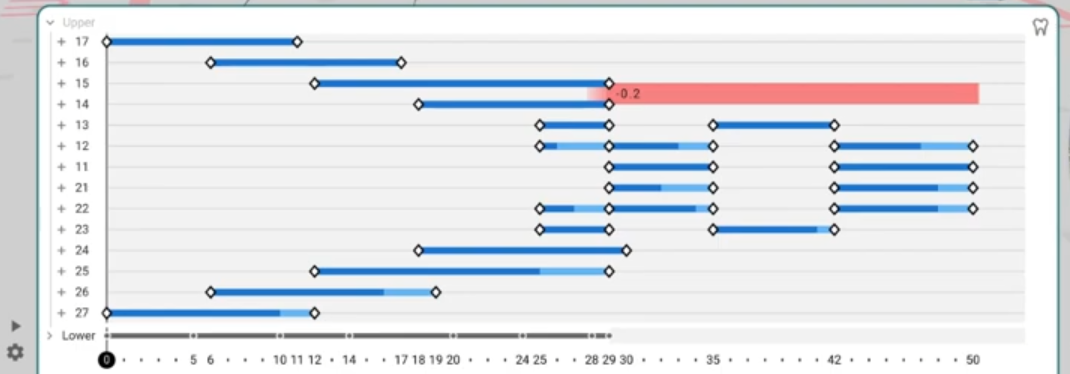
- Add a keyframe — move the tooth at the aligner you want; Titan creates or updates the keyframe there for you. You don't add keyframes as a separate step.
- Drag a keyframe — grab a diamond and drag it to another aligner to retime that part of the movement. Two keyframes can't land on the same aligner.
- Delete a keyframe — select it and press Delete, or use the delete icon that follows it on the bar. A single remaining keyframe is deleted too, since one keyframe alone isn't an animation.
- The bar's colour — dark blue is the standard movement speed, light blue is slower, and red means that stretch is moving faster than the safe speed. Change what "standard" means on the Movement Limits page.
Synchronized vs. per-tooth
The Timeline has two modes for how a change to one tooth affects the rest, set by the Synchronize toggle:
- Synchronized — retiming one tooth's keyframe shifts the equivalent keyframes on every other tooth (and on twin blocks, elastics, block-out splines and the Articulator's jaw keys) by the same amount, so the whole arch keeps moving together.
- Per-tooth — only the tooth you're editing changes; everyone else's timing stays put.
Turning on the Articulator forces the Timeline into per-tooth mode for as long as it's active, so adjusting the jaw never drags the rest of the plan's timing along with it — see Articulator.
Micro Staging — timing one axis of a movement
Select a tooth and open Micro Staging (the + next to its row) to break its single bar into six bars, one per movement axis: M/D, B/L, Extrusion, Rotation, Tipping, Torque. Drag a bar inside a step to shift when, within that step, just that one axis starts and finishes — for example, having the rotation finish a little before the translation. The axes don't need to stay lined up with each other, and a bar that turns red is moving unsafely fast in the shortened span.
For exact control, right-click a bar to create a keyframe directly:
- Simple key — a plain keyframe with the tooth's current position.
- Empty movement — a keyframe that holds the position without adding any new movement.
- Split movements — choose exactly which axes move before the new keyframe and which move after it.
- Separate movements — open a gap with no movement at all between two keyframes.
Reading the numbers between teeth
While the Timeline is open, the gaps between teeth on the model carry their own numbers — not part of the Timeline bar itself, but driven by the same aligner you're scrubbed to:
- Blue — a space between the teeth at that aligner.
- Red — planned IPR (stripping) at that aligner.
- An orange box under the number — those two teeth collide part-way through the plan, not just at the aligner you're on.
Good to know
- You can only move teeth — and add or edit keyframes — in Setup, Staging and Overcorrections. In every other phase the Timeline is view-only.
- The Timeline needs the treatment-edit permission; without it, scrubbing still works but editing is greyed out.
- A phase that only ever shows one keyframe (like a fresh case before you've moved anything) still has the Initial marker — there's always a starting position, even with nothing else on the bar.