Pontics
A pontic is a false tooth you place in the aligner to fill a gap or an extraction space, so the aligner keeps its shape and looks right across the empty space. You add a pontic from the Attachments step, and when one is selected its own panel opens — the shape, the position, the sizes, the material, the aligner range, and the tools. What a pontic is for clinically is covered in the pontics manual; this page is about running the panel.
Open it
In the 3D View, go to the Attachments step. Place a pontic from the shape picker's menu, or click a pontic already on the model. The Pontic panel follows the selected pontic.
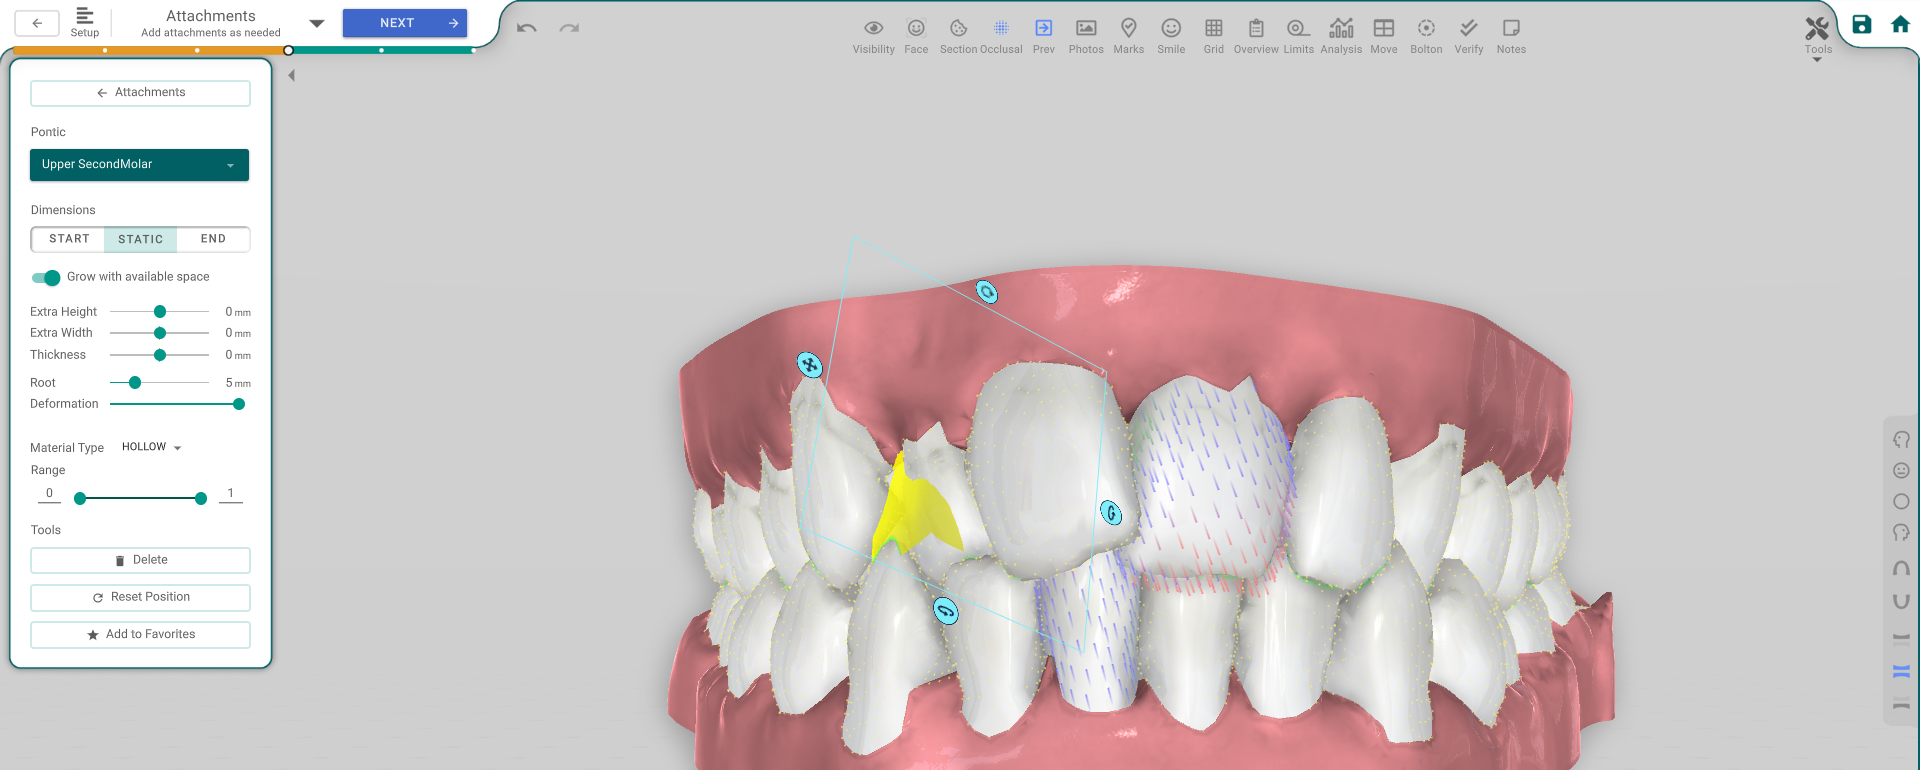
The panel, button by button
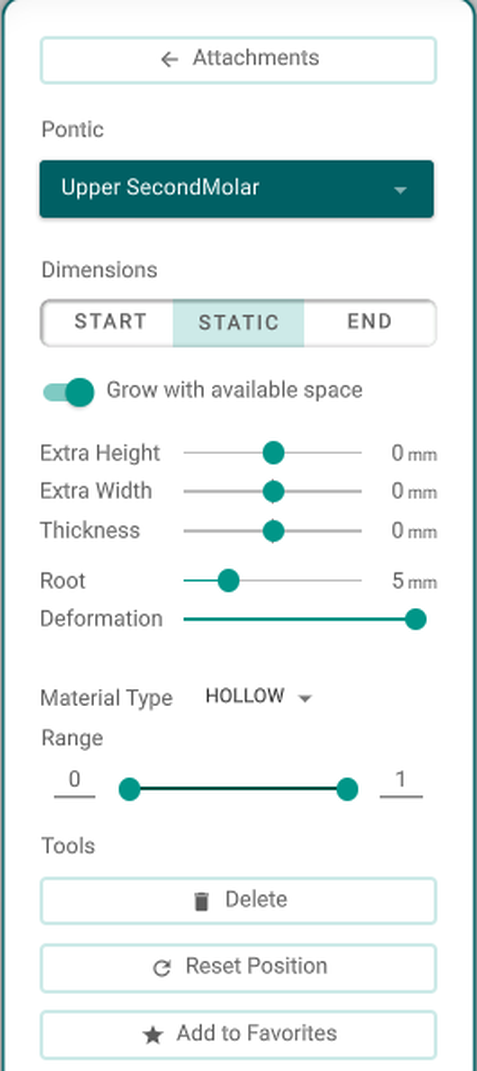
- Attachments (Back) — returns to the Attachments panel.
- Shape dropdown — pick the pontic's shape.
- Start / Static / End — the position; sets how the pontic sizes across the aligner steps: growing from the start, staying the same, or growing to the end. While it's None, the size sliders below are greyed out.
- Grow with available space — let the pontic fill the gap on its own; turn it off to set Height, Width and Thickness yourself.
- Extra Height / Extra Width / Thickness — shown only while it grows on its own.
- Root / Deformation — adjust the root length and the shape of the pontic.
- Material Type — Hollow / Solid / Visual — how the pontic is produced.
- Range — the aligner range the pontic is present for.
- Delete — removes the pontic (or the Delete key, unless you're typing in a field).
- Reset Position — moves it back to its default place.
- Add to Favorites — saves the pontic so you can reuse it.
The tools are locked while the pontic starts inside an already-printed, locked aligner range.
Good to know
- The controls are greyed out without the treatment-edit permission.
- A pontic becomes part of the aligners and is carried into the printing phases with the other attachments.