Attachments
The Attachments step is where you add the small shapes that let the aligners grip and move the teeth, together with the related elements — pontics, precision cuts, twin blocks and elastics. Its side panel has a shape picker for the next attachment, the Presets and Automatic Placements tools, and an Attachment Analysis block that shows the analysis on the model. What each attachment type is for clinically is covered in the attachments manual; this page is about running the panel.
Open it
In the 3D View, choose the Attachments step (after Staging). Attachments are placed against the staged movement, so finish Setup and Staging first.
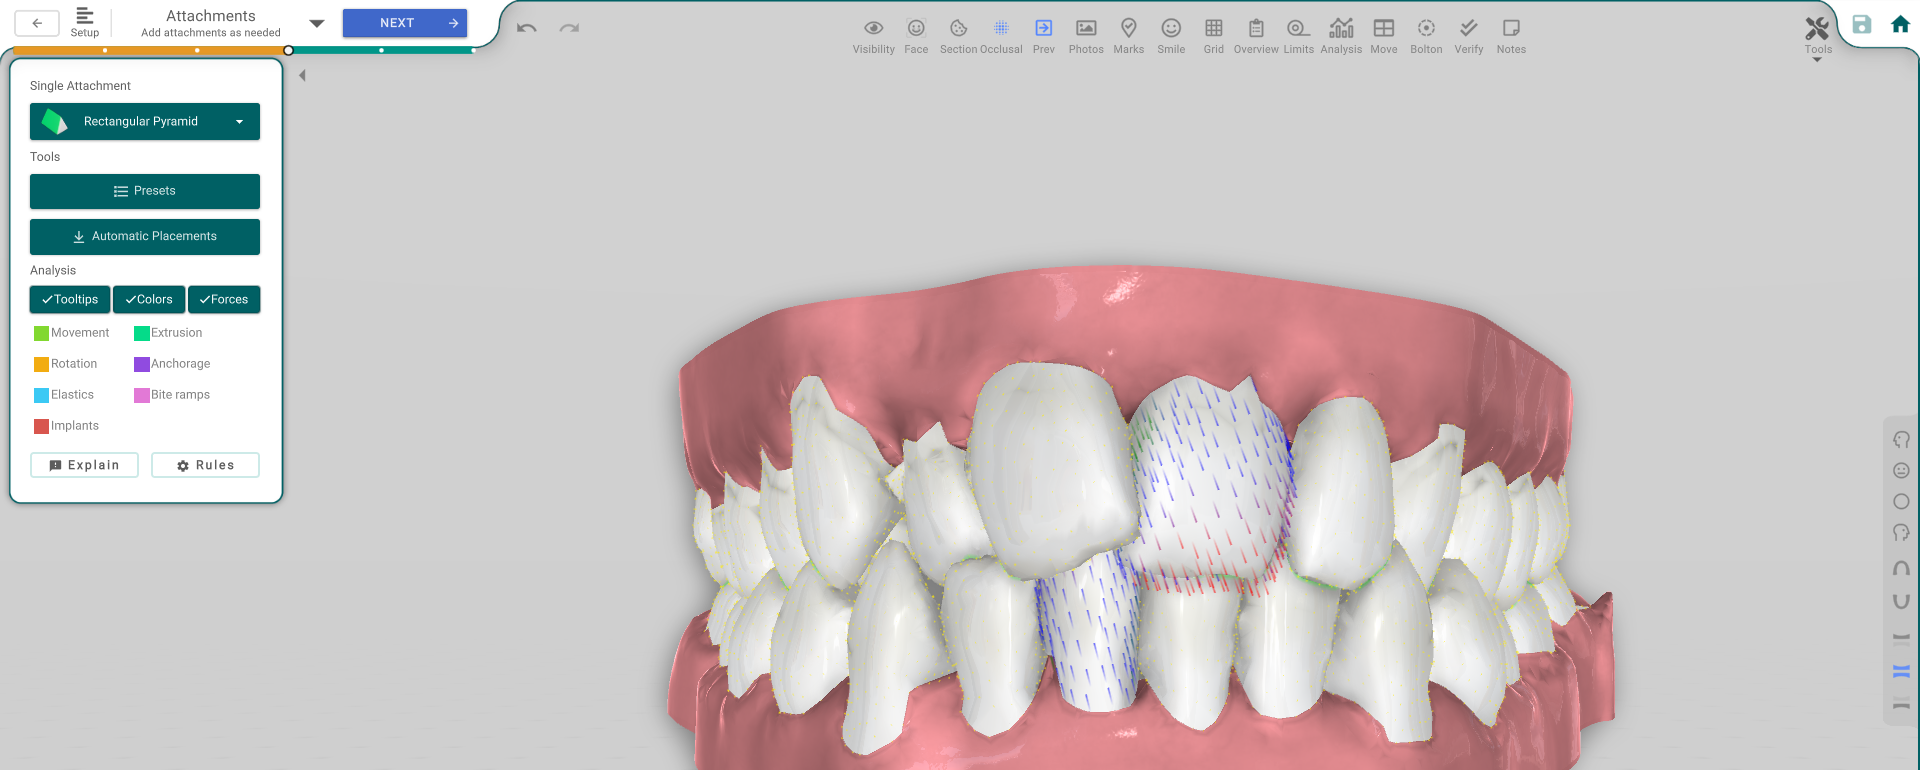
The panel, button by button
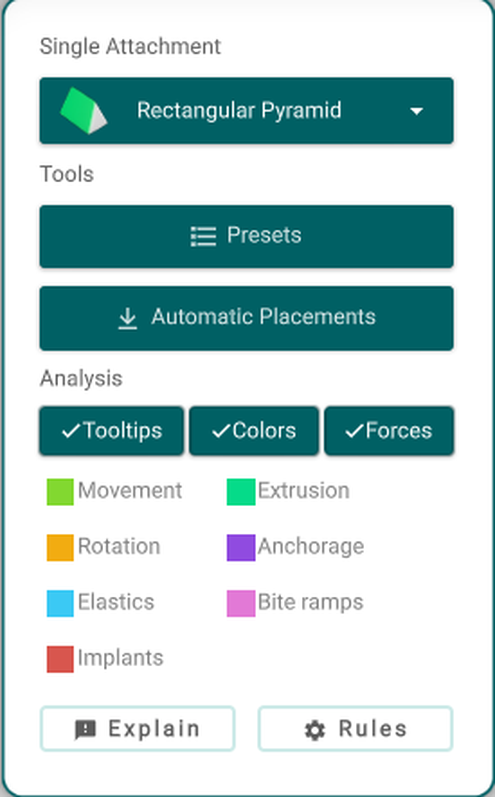
- Single Attachment — pick a shape, then click the tooth to place that attachment. The menu also reaches pontics, precision cuts and twin blocks (the "Indirect Bonding" section); each opens its own panel when you place or select it.
- Presets — apply a saved set of attachments at once.
- Automatic Placements — let Titan place attachments from the case analysis (the movement, force and root analysis).
- Tooltips — show the per-tooth attachment notes.
- Colors — paint the analysis colours on the teeth: Movement, Extrusion, Rotation, Anchorage, Elastics, Bite Ramps and Implants (legend below).
- Forces — show the force arrows.
- Explain — opens a report that says why each attachment is suggested.
- Rules — opens the automatic-attachment settings, where you change the rules the automatic placement follows.
Good to know
- Click a placed attachment, pontic, precision cut, twin block or elastic to open its own panel and edit it. Each has its own help page.
- Attachments, pontics, precision cuts, twin blocks and elastics become part of the aligners and are carried into the printing phases.
- The controls are greyed out without the treatment-edit permission.