Shell
The Shell step shapes the aligner itself — how thick it is, how much room it leaves around the teeth and attachments, and how it's finished. It's one of the printing steps.
Open it
In the 3D View, go to the Shell step, one of the printing steps.
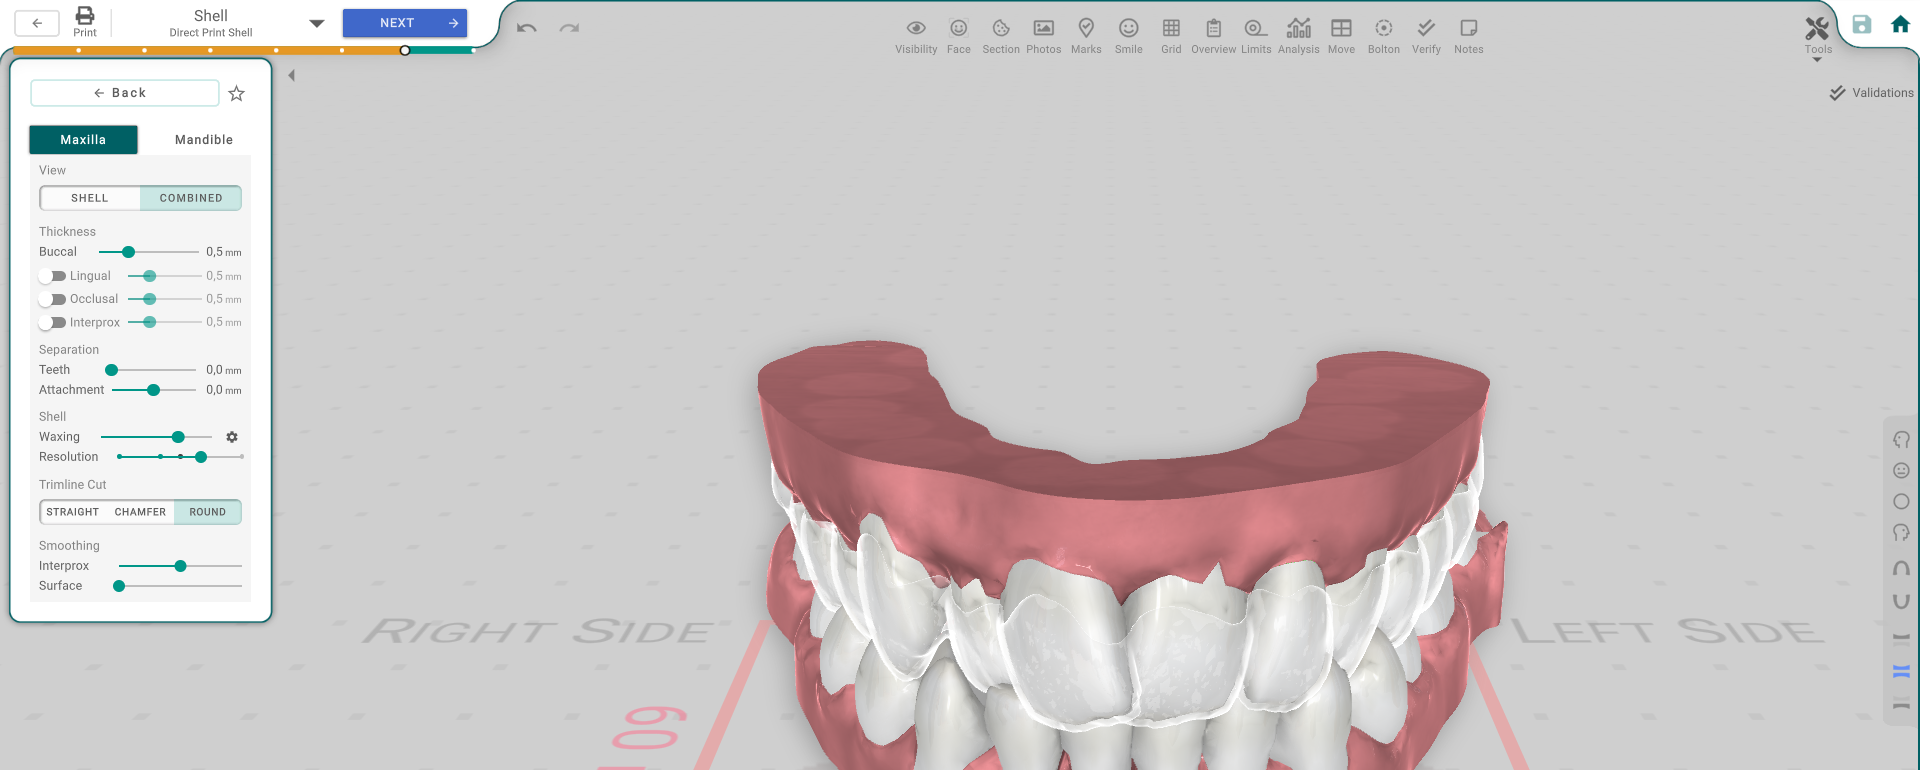
The panel, button by button
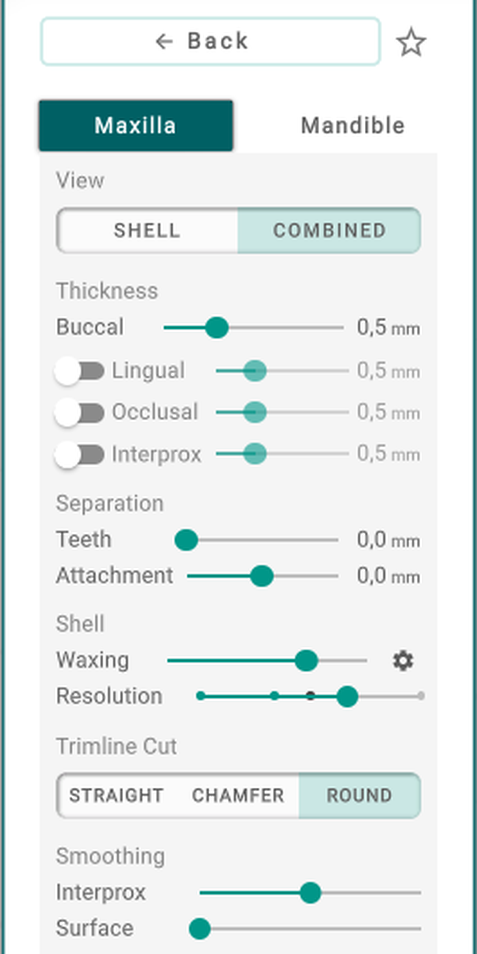
- Maxilla / Mandible — which arch the settings below act on.
- Shell / Combined — the view: the shell alone, or combined (see-through) over the teeth.
- Thickness — Buccal / Lingual / Occlusal / Interprox — the overall thickness and the per-surface overrides.
- Separation — Teeth / Attachment — the gap the shell leaves around the teeth and the attachments.
- Waxing — the wax-up gaps carried from the Wax-Up step.
- Resolution — the mesh detail of the shell.
- Trimline Cut — Straight / Chamfer / Round — how the shell's edge is finished.
- Smoothing — Interprox / Surface — the surface finish.
Thickness
Choose Maxilla or Mandible to pick the arch, and set the View — see-through to check the gap between the teeth and the shell, or solid to see the shell itself.
Set the overall Thickness of the aligner. A thicker shell on posterior teeth gives more grip and force for heavier molar movements; keep anterior teeth thinner where there's little movement, for comfort.
Turn on the custom Lingual, Occlusal or Interprox overrides to set a different thickness on those surfaces. Occlusal is worth watching in particular: making a region thicker also thickens it where the upper and lower teeth bite together, which can feel bulky to the patient on closing. Reduce it with the Occlusal override — unless the patient grinds their teeth, in which case keeping it thicker there adds strength. While a tooth is selected, you can set the thickness on just those teeth.
Fit and finish
- Separation — the gap the shell leaves around the teeth and around the attachments. Normally flush against the tooth for grip (so the aligner can move it); a looser separation near the gum line can add patient comfort.
- Waxing — the wax-up gaps carried from the Wax-Up step.
- Trimline cut — straight, chamfer or round. Pick straight if supports will sit along that edge (printing upside-down with supports there) — it smooths cleanly after the supports come off, without losing material. Pick round (or the in-between chamfer) if the edge is already finished and ready for polishing, with supports placed elsewhere.
- Resolution and smoothing — the mesh detail and the surface finish.
The ★ saves the current shell setup or recalls a saved one.
Print it directly from Titan
Instead of sending your model to a lab's own software to build the shell, Titan can build it for you and export it ready to print. On the Export panel (Export STL), pick Shell as the target.
Good to know
- The shell is set per arch — switch the tab to do the other one.
- The shell is the printed aligner, so each change rebuilds it.